
Profile and security
All usersThe profile screen shows your personal details at the top, followed by four tabs that group the remaining settings.
Profile tabs overview
| Tab | What it contains |
|---|---|
| Security | Privacy (searches, and what fellow members see), App lock, change password, manage subscription, GDPR data export |
| Culture | Language, date format, timezone, time format, units, automatic translation |
| Time Off | Temporary availability status |
| Per Device | Theme (light/dark/system), upcoming events panel, device calendar sync, notification preferences |
Update your profile details
- Open Profile.
- Edit the fields at the top of the screen.
- Save with the Save button at the bottom.
You can update:
- first name and surname,
- phone number,
- avatar image,
- timezone,
- culture/language,
- date format,
- privacy settings,
- time format preference,
- whether you see automatic translations, and the languages you read.
Profile picture
Tapping your avatar lets you take a photo with the camera, choose one from your gallery, or remove the current image. The app crops the selection to a square and shows it straight away, but like every other change on this screen it is only saved when you press Save.
Custom profile pictures are a paid feature. On a free account, the avatar button shows a lock icon. Tapping it opens the Coach Pass upgrade flow.
profile-screen-android.pngprofile-screen-ios.png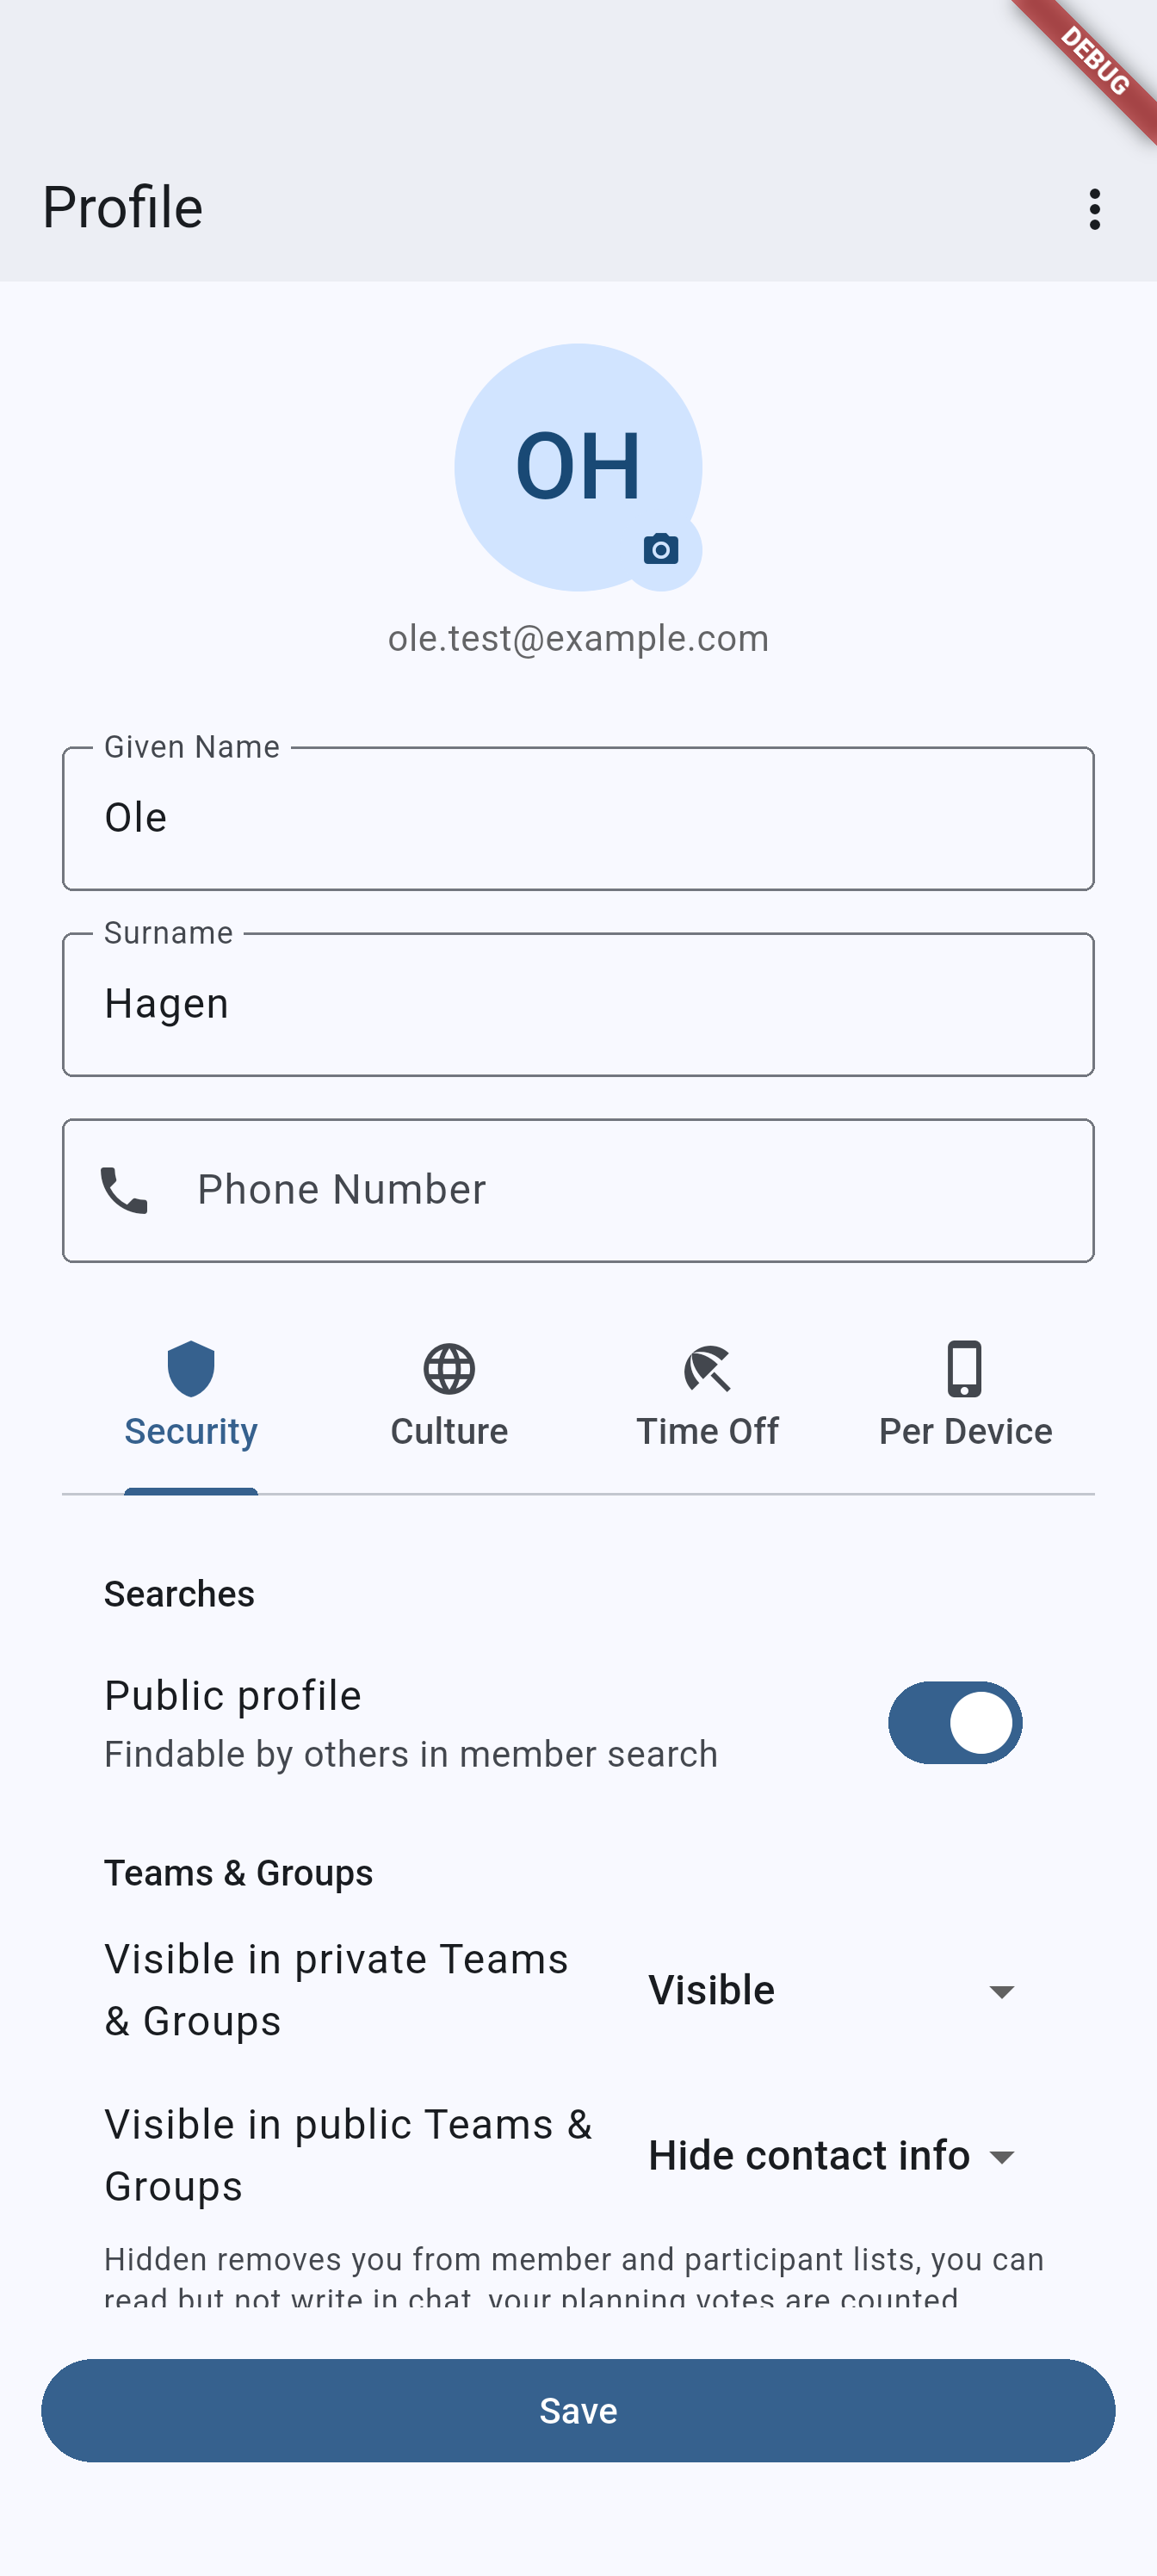
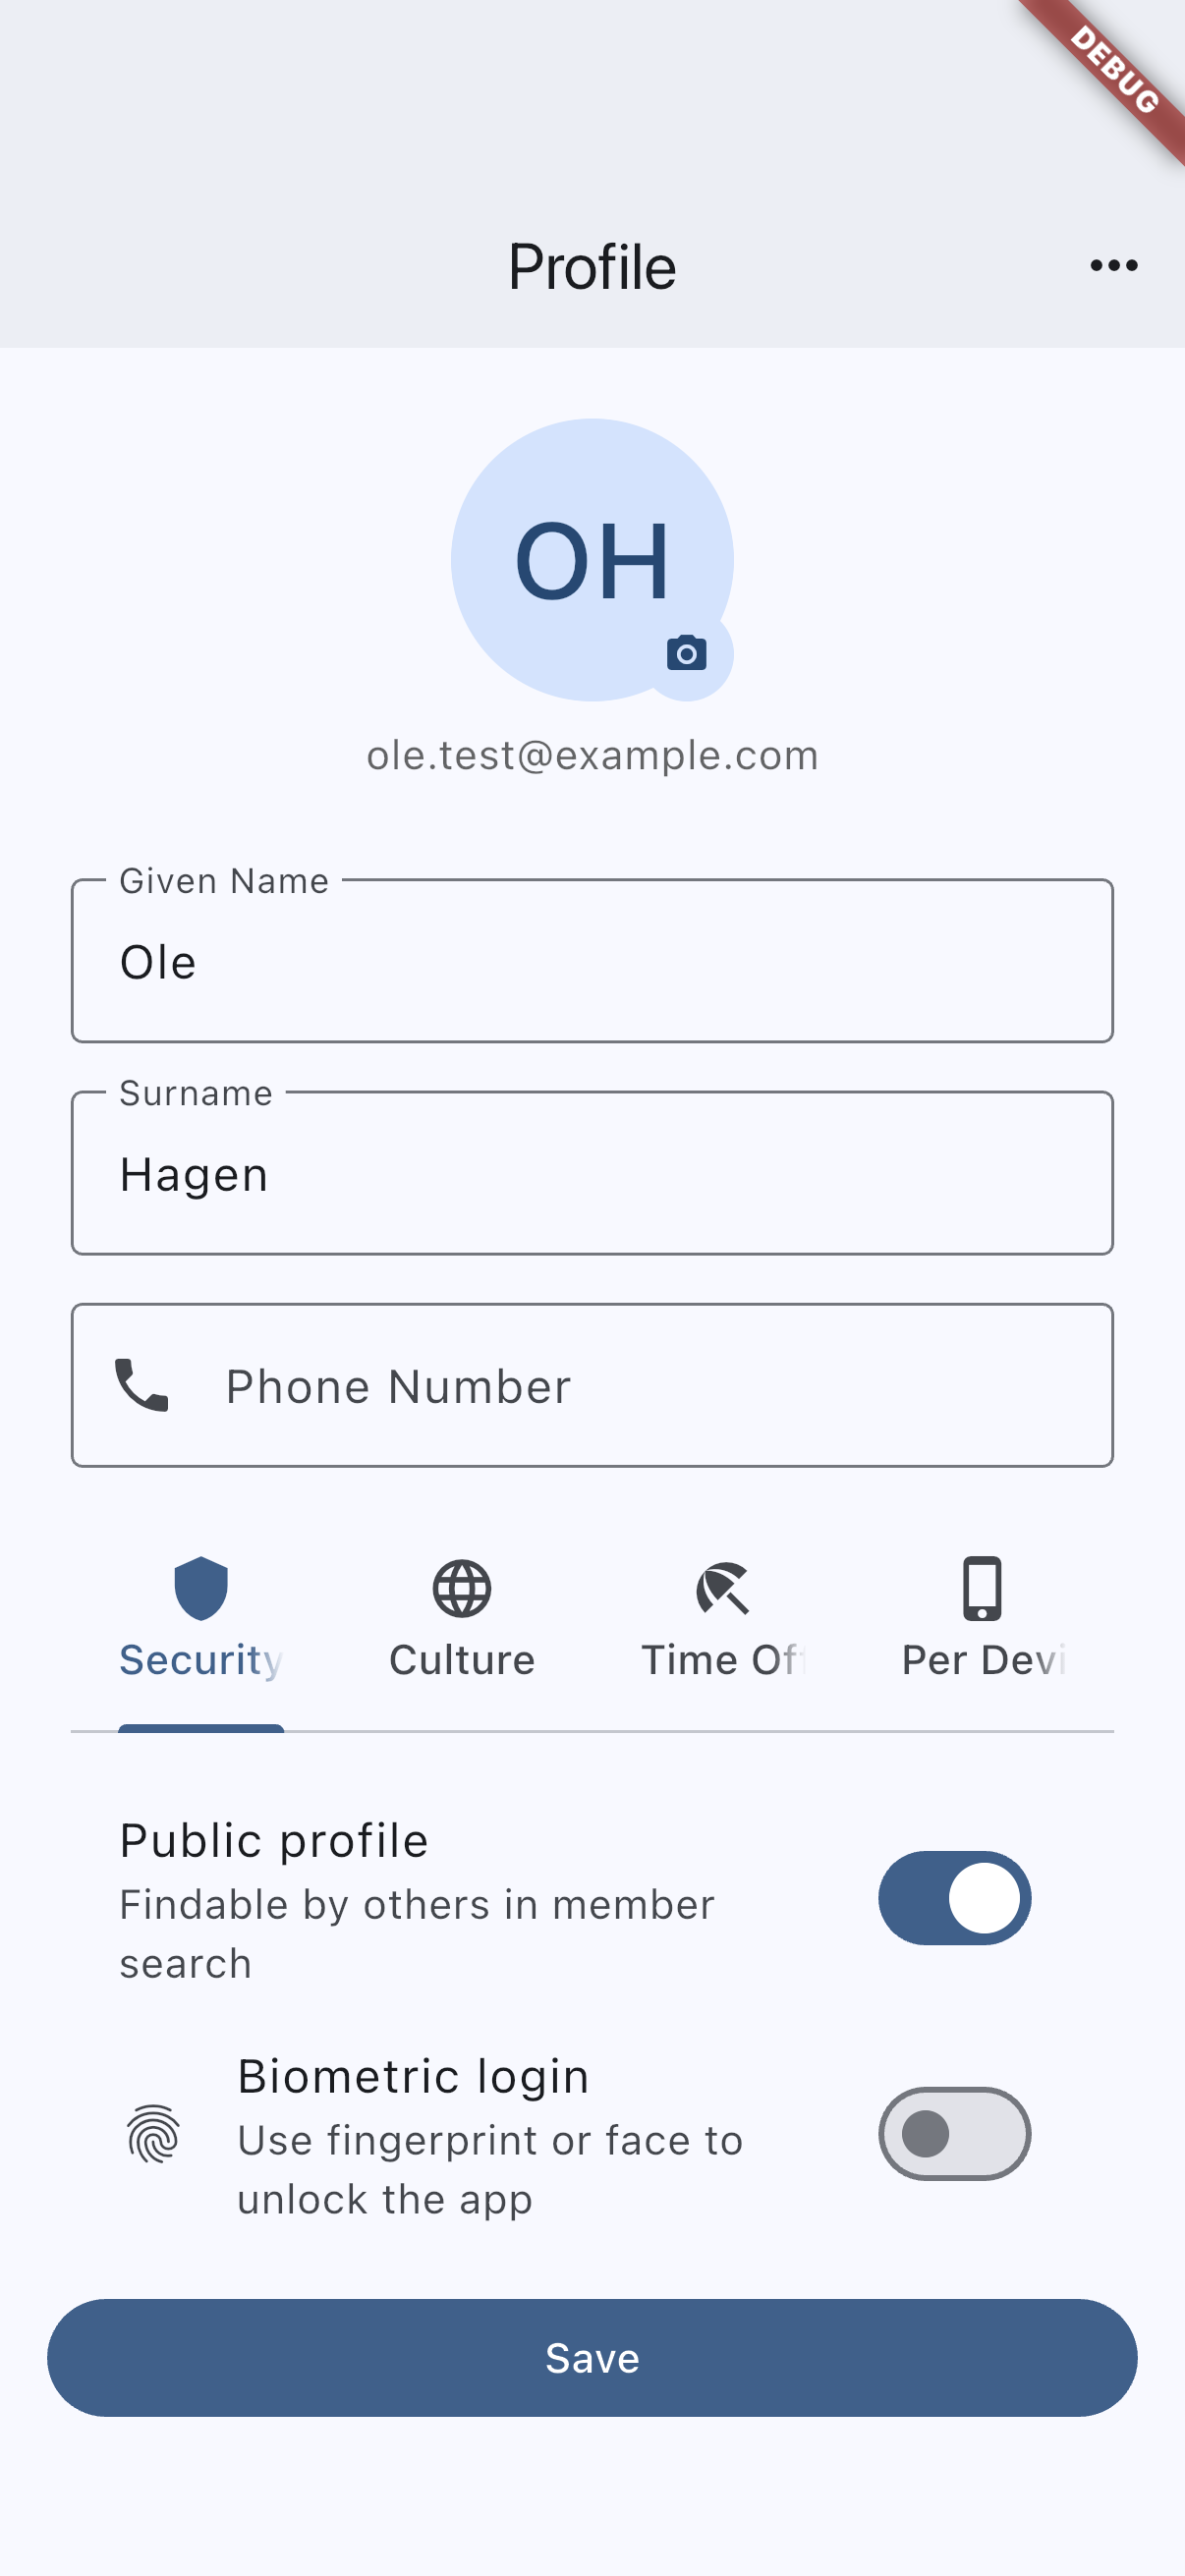
Recommended capture: the profile screen with avatar, name fields, and the Save button visible.
Security tab
Privacy
Privacy is set in two parts: whether strangers can find you at all, and what the people already in your teams can see.
Searches
Visible — “Findable by others in member search” — is on by default. Leave it on and people who can invite to a team or group — its admins, and members of one that lets members invite — can find you by name, or by your exact email address, to invite you. Turn it off and your profile is hidden from that search.
This is the same wording used for teams, groups, sessions and activities: the toggle always describes what is public, and turning it off is the private option.
Teams & Groups
Two dropdowns decide what your fellow members see of you, and they are set separately for the two kinds of team — because being let into a private team by someone who knows you is not the same as joining a public one from Discover.
- Visible in private Teams & Groups — Visible by default.
- Visible in public Teams & Groups — Hide contact info by default.
Each offers three levels:
| Level | What other members see |
|---|---|
| Visible | Your name, picture and contact details, as before. |
| Hide contact info | Your name and picture, but not your email address or phone number. |
| Hidden | Nothing. You are left out of member and participant lists, you can read the chat but not post in it, your activity-planning votes are counted without your name, and you are not entered into prize draws. |
Three things never change, whichever level you pick:
- Admins always see you. Someone has to be able to reach you about the team.
- You always see yourself. Your own row never disappears from under you.
- Numbers still include you. Hiding who is coming never changes how many are, so an event you joined still counts toward its capacity.
Things you post keep your name on them where the point of them is that you said it — a poll you created as an admin, for instance. Set to Hidden, the parts that name you in passing are what go: lists, votes, and the chat you can no longer post to.
These settings are yours on every plan. They are never restricted by the team’s subscription.
The preferences step of registration has the same Public profile switch, already on. The Teams & Groups levels start at their defaults, and you can change all of it later from Profile → Security at any time.
A managed member (a roster entry with no login of its own) has no such switch: it belongs to one team or group, and member search never finds it. See Teams and groups.
Email verification
An account registered with an email address has to prove it owns the address. Until it does, a Confirm your email address banner sits at the top of Home — it cannot be dismissed — and any team invitations sent to that address are held back. Tap Enter code to open the Confirm your address sheet: type the six-digit code from the email into Confirmation code and press Confirm, or ask for Send a new code. A code lasts 24 hours and allows five attempts. Setting a new password with Forgot password confirms the address too, since the code reached your inbox. Accounts signed in with Google or Apple are already confirmed and never see the banner.
Once the address is confirmed, the invitations sent to it appear on Home, where you accept or decline each one — nobody is added to a team or group without accepting. An invitation link opened before then explains why it is waiting and offers Enter code right there. Email addresses are not case-sensitive: Alice@Example.com and alice@example.com are the same address.
App lock
The App lock group on the Security tab puts a lock of your own in front of the app on this device. It guards a session that is already there — it is not a way of signing in — and it applies to this device only.
- App lock — the method: Off, Fingerprint or face, PIN, or Fingerprint or face, with PIN. Choosing a method with a PIN opens Choose a PIN: four to six digits, kept on this device only, repeated once to confirm. Change PIN appears once one is set.
- Lock again — how long the app may sit in the background before it locks: Straight away, After 1 minute, After 5 minutes (the default) or After 15 minutes.
Nothing here changes the lock until you press Save at the bottom of the profile screen, exactly like the other settings there. Done in the PIN sheet only keeps the PIN for that save. If you leave the screen without saving, it asks first — and discarding leaves the lock exactly as it was.
With a lock set, opening the app — or coming back to it once that time has passed — lands on the InOrOut is locked screen. Tap Use fingerprint or face where the lock uses it, or type the PIN and tap Unlock. Five wrong PIN attempts sign the device out. If you have forgotten your PIN, Sign out instead is the way out: it signs this device out, and you sign in again with your password.
The App lock protects the app on the current device only; another device you sign in on has a lock of its own, or none. It never replaces your password — signing out and in again always works, lock or no lock.
Approve a QR sign-in
When somebody scans a QR sign-in code from a device trying to get in, the Authorize device screen opens here on your signed-in phone. It names the device that asked and expects the two-digit code shown on that device’s screen. Approve only a sign-in you started yourself, and only while you can actually see the other screen — a wrong code ends the attempt permanently. The full flow is on Getting started.
Approving is also where your App lock is asked for a second time: at the Approve tap itself, the screen asks for your fingerprint or face first and then your PIN, whichever the lock uses — even when the phone is already unlocked, so somebody holding it cannot approve without also being you. A device with the lock off is not asked; the warning on the screen is what it has instead, which is one more reason to set one.
Signing out
Signing out from the home overflow menu ends the session on the server, not just on the phone: the saved credentials on that device stop working immediately instead of lingering until they expire. If the phone is offline when you sign out, it still signs out locally and revokes the session the next time it reaches the server.
Password management
Email/password accounts can change their password from the Security tab. Social-only accounts may not see the same password options.
Reset your password when you cannot sign in
- Open Forgot password from the login screen.
- Enter your email address.
- Use the 6-digit code from the email.
- Enter and confirm the new password.
A reset signs you out on every device, and none of them gets notifications again until you sign in there.
Change your password
- Open Profile → Security.
- Tap Change Password.
- Enter your current password.
- Enter and confirm the new password.
- Save the change.
This device stays signed in. Every other device is signed out and stops getting notifications until you sign in there again.
change-password-dialog-android.pngchange-password-dialog-ios.png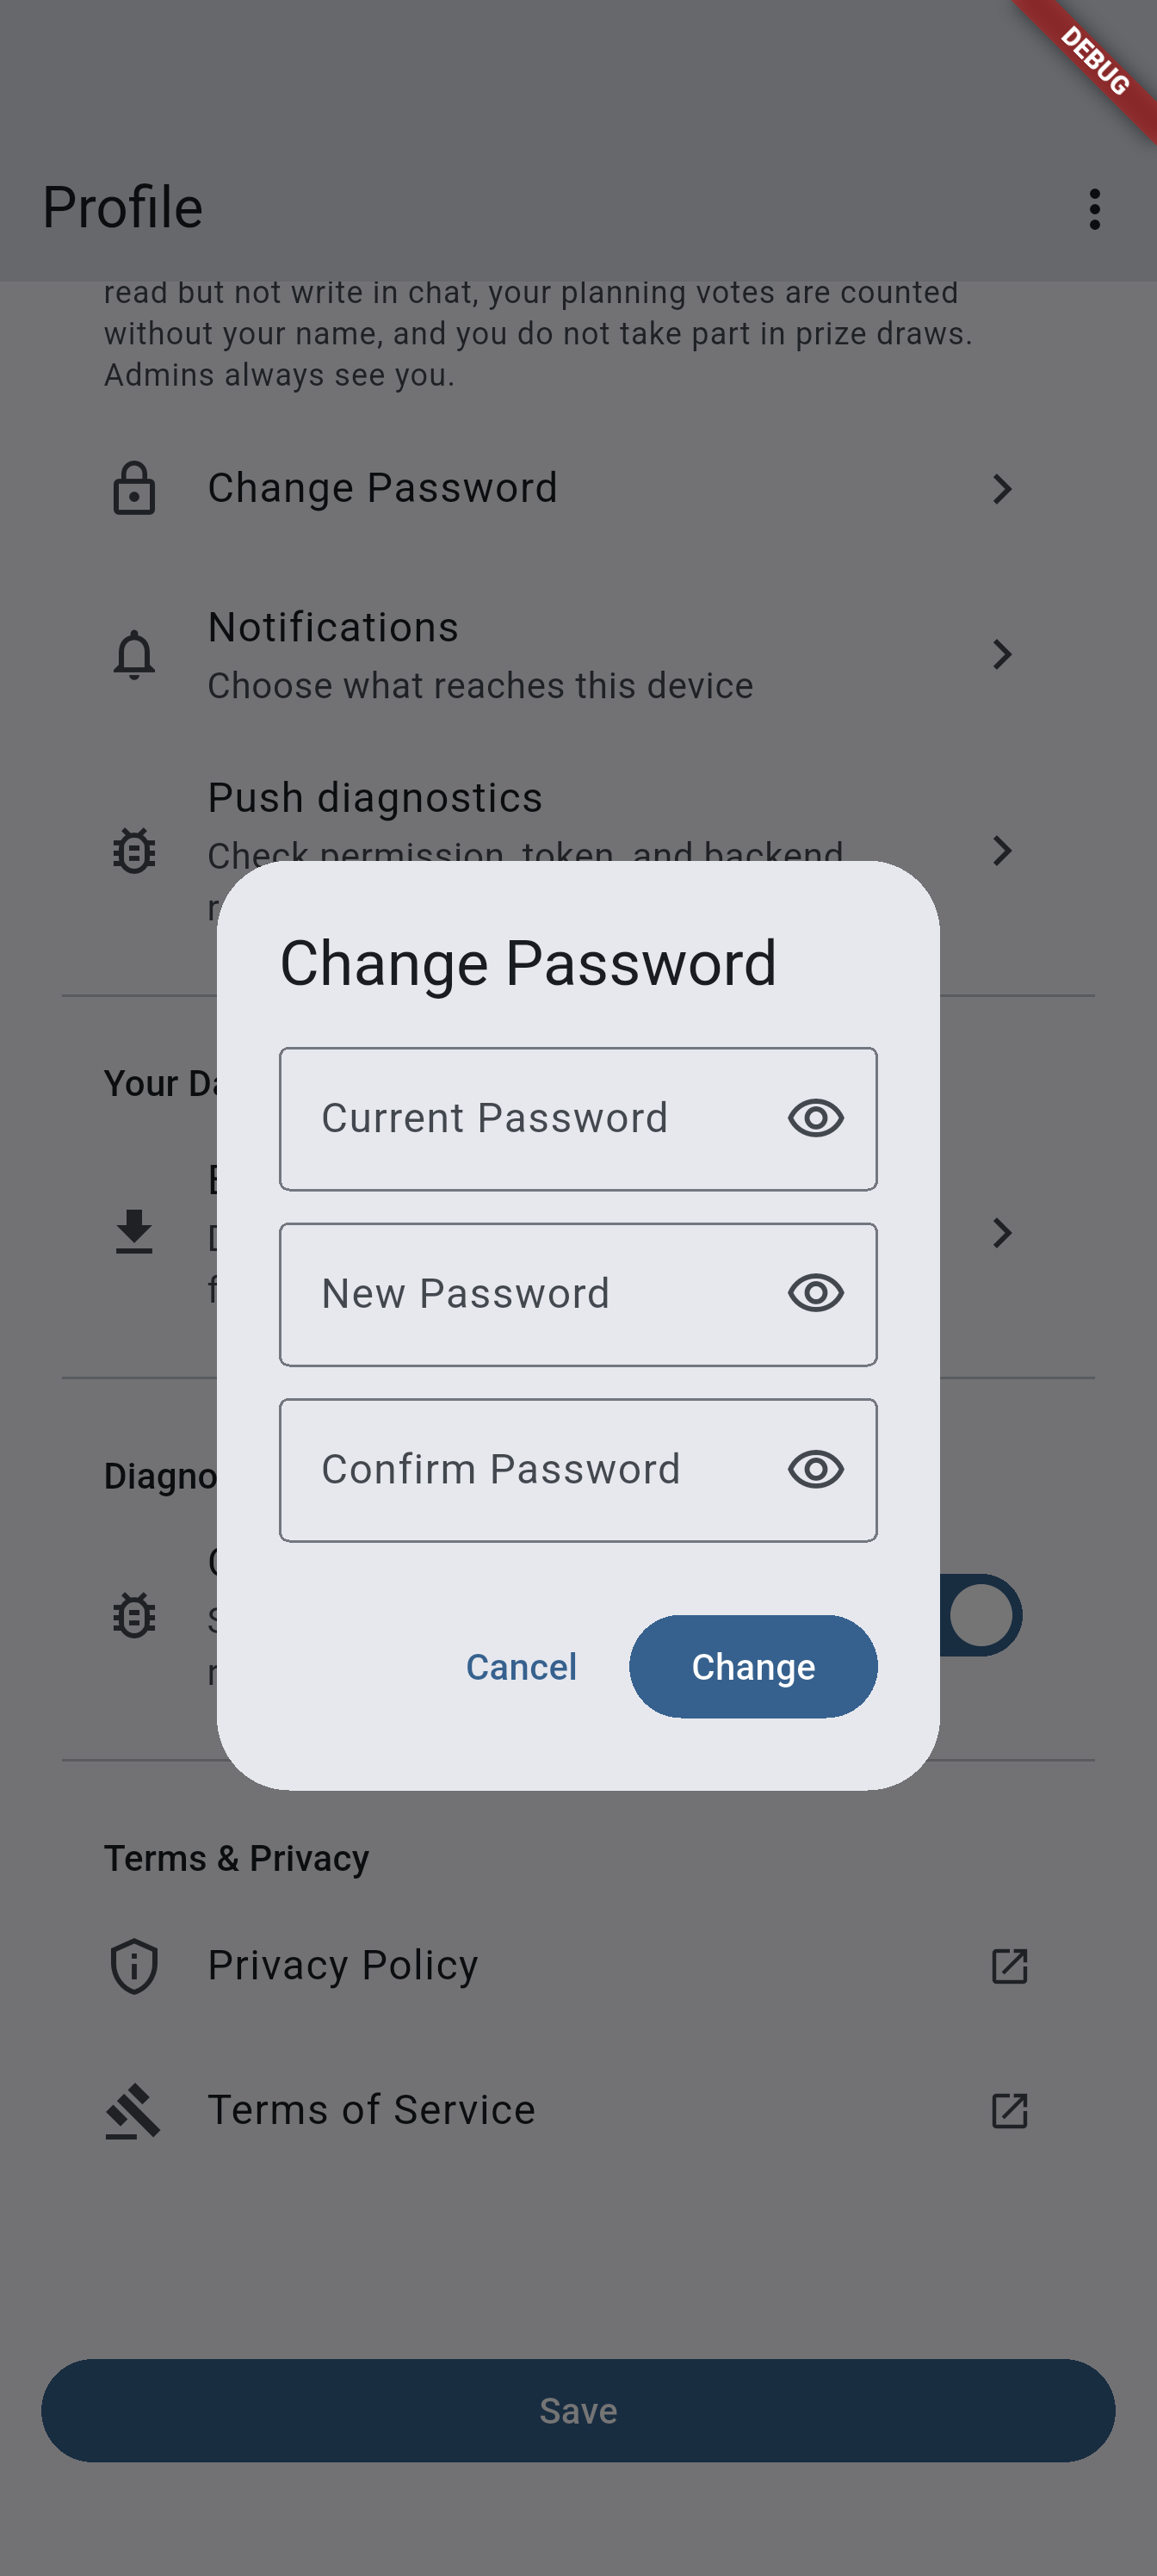
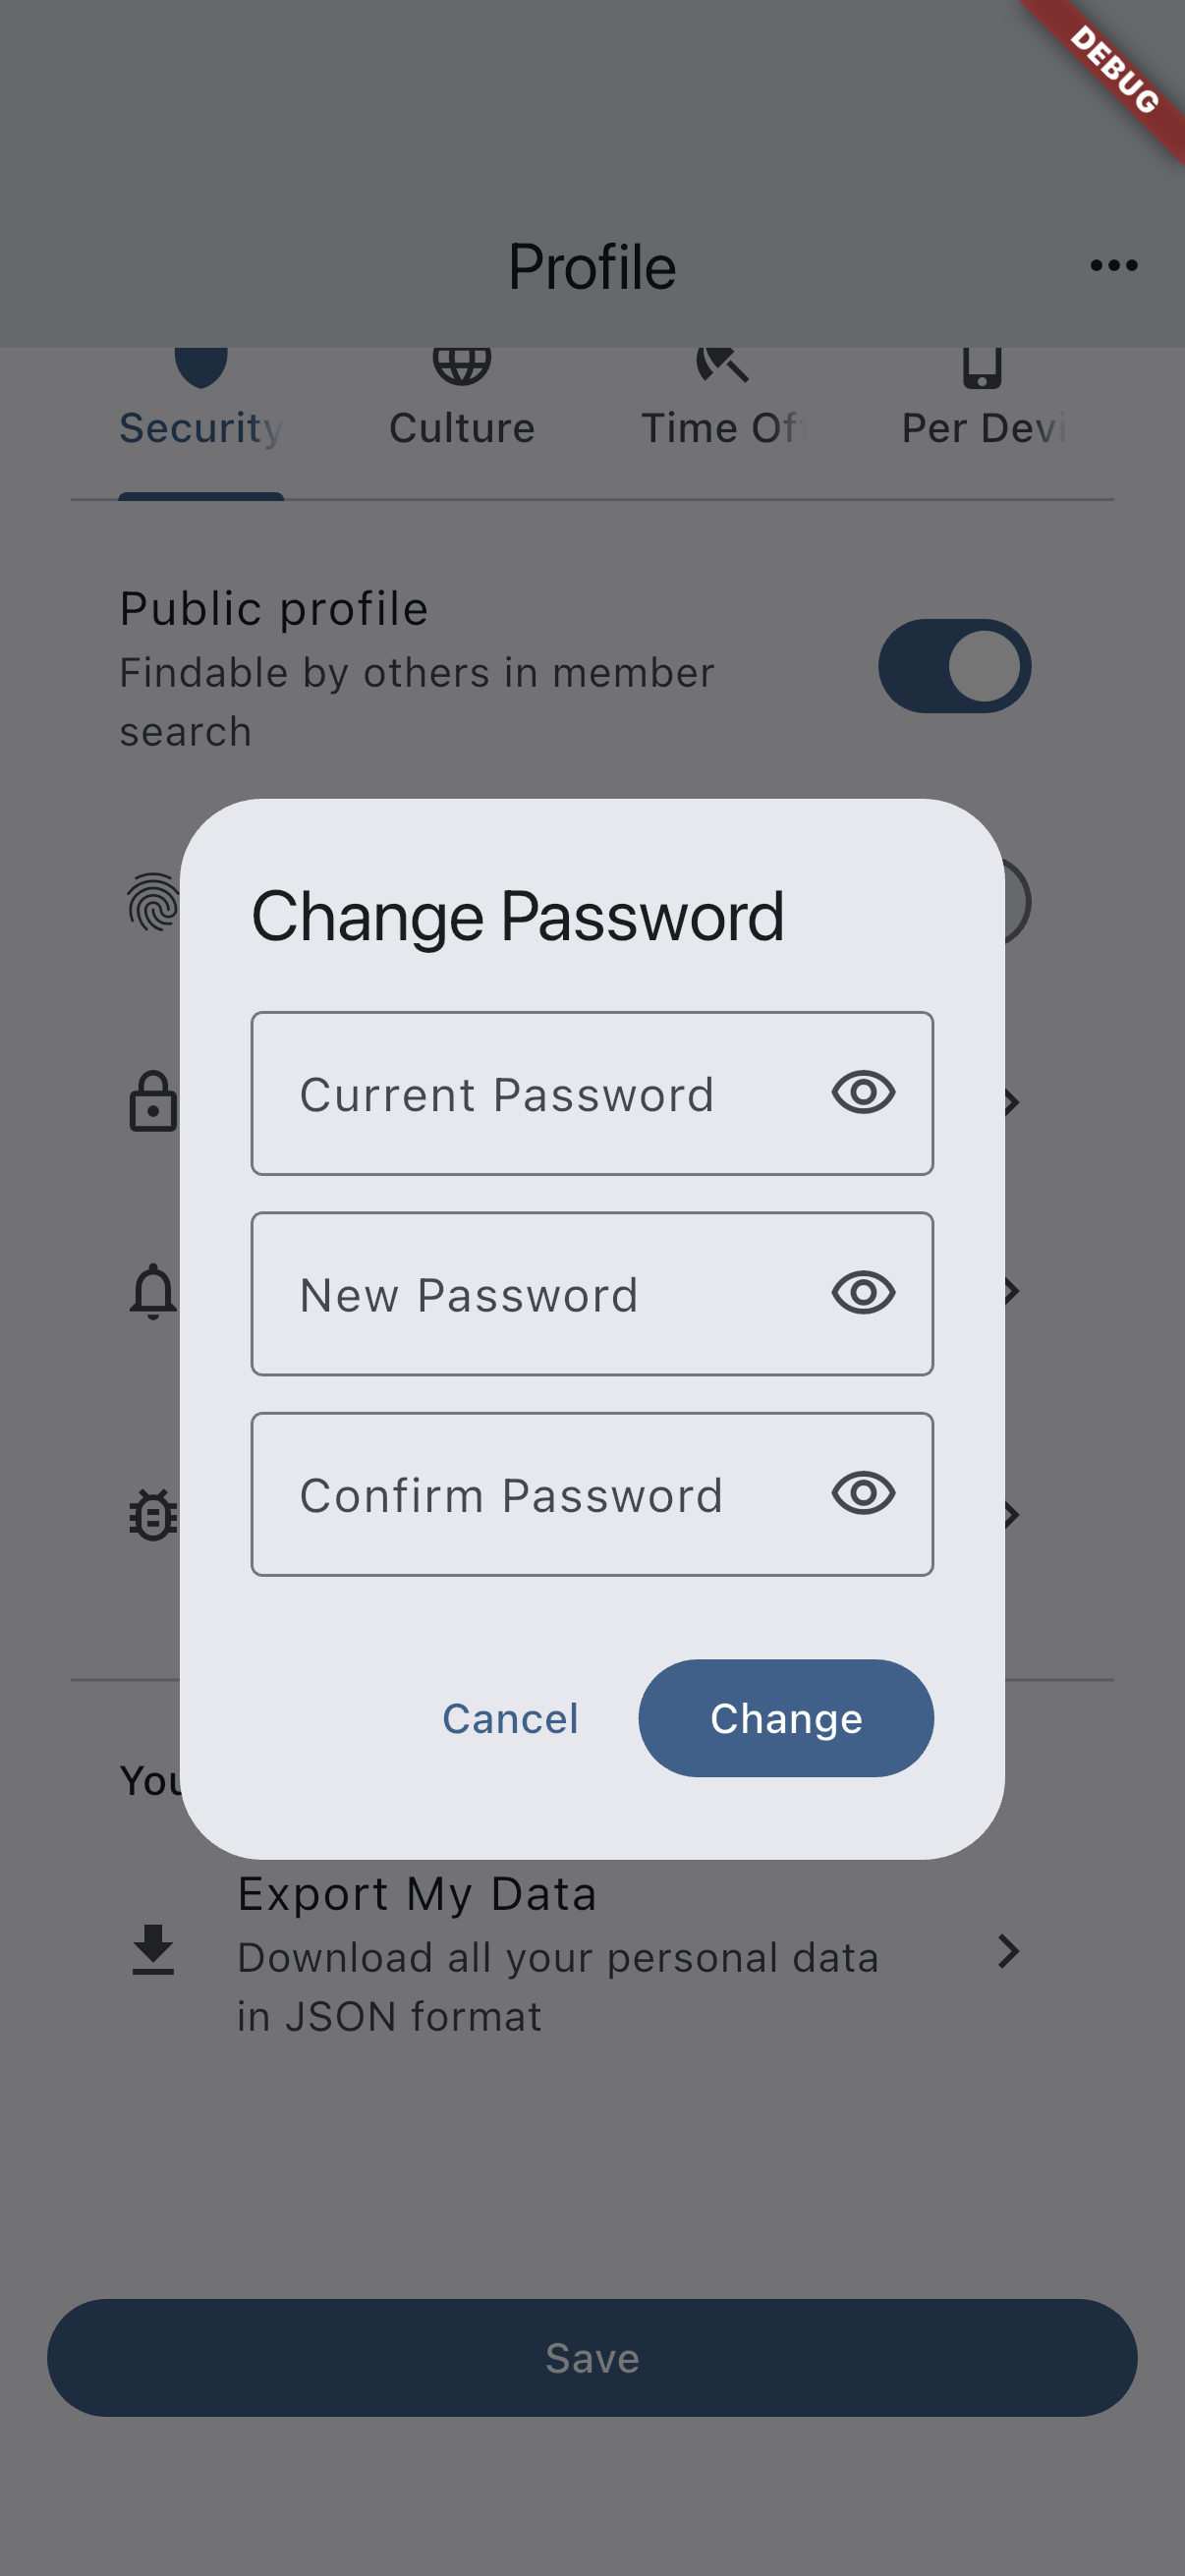
Recommended capture: the Change Password dialog with current password, new password, and confirmation fields visible.
Manage subscription
If you have an active Coach Pass, a Manage Subscription entry appears in the Security tab. Tapping it opens the store’s subscription management screen.
Blocked users
Blocked users lists the members you have blocked — the people whose chat messages and Forum posts you have chosen not to see. Tap Unblock next to a name and their messages and posts are back the next time the chat or the Forum loads. The list is yours alone: nobody on it is told they are there.
You block somebody from one of their chat messages, from their profile sheet in a team’s Members tab, or from the menu of one of their Forum posts — see Block a member.
Your data (GDPR)
You have the right to receive a copy of all personal data InOrOut holds about you.
- Open Profile → Security.
- Scroll to Your Data (GDPR).
- Tap Export my data.
- The app fetches your data and opens the share sheet so you can save or send the JSON file.
The export includes your profile fields, group memberships and join requests, event participations, chat messages, your settings on each device, activity-planning votes, time-off records, the pictures on polls you made (as links that expire within days), and what you did as an admin. Other people appear by an id only. Password hashes, reset codes and other sign-in secrets are never included.
Culture tab
Language
Sets the language used throughout the app and in push notifications.
Date format
Overrides the date display pattern independently of the language setting. Auto (from language) follows your language’s standard pattern, and you can go back to it at any time.
Timezone
The app shows every time on your device’s own clock, so this setting changes nothing you see on a card or in the calendar. It is the zone the server uses when a notification names a date that has no event behind it — the day your time off ends, or when a subscription expires — and the zone the activity-planning date-preferences chart reads its weekdays and hours in.
Time format
Chooses between a 12-hour and a 24-hour clock, everywhere the app shows a time and in every time picker. Auto (from device) — the default for a new account — follows whatever your phone is set to, and picks up a change the next time you open the app. Choose 12-hour or 24-hour to fix it regardless of the phone.
Units
Chooses the distance unit used where the app shows a distance — most visibly the radius slider and the result list on the Discover tab. Auto (from language) follows your language setting, or pick Kilometres or Miles to fix it regardless of language. Note that English is treated as American English here, so it means miles — set the unit explicitly if you read the app in English but measure in kilometres.
See translations
Some teams offer automatic translation of announcements and events — a Business feature described under Chat and announcements. The switch is on by default. Turn it off to always read text as written, both on screen and in push notifications.
The switch only appears once automatic translation is available. Until then there is nothing for it to decide, and the row is hidden.
Languages you read
Shown under See translations while that switch is on. Your app language is always selected; tick the other languages you read, and text written in any of them is shown as written instead of being translated. A Norwegian speaker who uses the app in English can tick Norsk and keep reading Norwegian announcements in Norwegian.
The list is kept when you turn See translations off, and comes back as it was when you turn it on again.
Your choices here also help the app recognise what you wrote. Very short text — a poll question like “Hvor?” — looks the same in several closely related languages, so the languages you read are used as a hint when the text is written rather than read. A Norwegian who uses the app in English is no longer told their own question was written in Danish.
Time Off tab
ProYou can use Time Off when your access reaches Pro or Business through a paid group you belong to or through a Coach Pass. Free-only access is not enough.
Mark yourself as unavailable for a period — for all your groups, or only the ones you pick. An injured player can sit out the football team’s sessions while still joining the quiz club’s events. In every covered group the time off:
- automatically declines all future event occurrences within the period,
- blocks joining events and voting on activity planning — though a single event can still be joined deliberately with Join anyway,
- shows your group members a time-off indicator on the member list, unless they cannot see you there in the first place,
- and replaces the join/decline controls on event cards and the detail screen with your reason icon.
Two kinds of group are left alone entirely, and behave as if there were no time off at all: groups outside the time off’s scope, and groups on the Free tier. Time off is a paid feature per group as well as per person, so a Free group is never touched by it — nothing is declined there, nothing is blocked, and no indicator appears.
Activate time off
- Open Profile → Time Off tab.
- Choose a reason icon (Injured, Vacation, Sick, Work, Personal, or Other).
- Leave the All groups toggle on, or switch it off and tick only the groups the time off should apply to. All groups also covers groups you join while it is active — and a group that moves up to Pro or Business later — where an explicit selection does not. Either way, only Pro and Business groups are covered: the toggle says so underneath, and in the list a Free-tier group is greyed out and marked Needs Pro or Business.
- Pick an end date — the date you expect to be available again.
- Tap Activate.
If none of your groups are on Pro or Business, the tab says so and Activate stays disabled — there would be nothing for the time off to apply to.
Future events you had already joined will be switched to declined in the covered groups.
If you change the form but leave the profile without activating — or tap Save at the bottom — the app asks whether to activate the time off first, discard the changes, or stay.
Join a single event anyway
Time off is a default answer, not a lock. On an event in a covered group, a muted arrow sits next to your reason icon (on the detail screen it is a Join anyway button). Confirm the prompt and you are joined to that one occurrence; everything else stays declined. A join-anyway on a full event takes a regular place in its waiting list and keeps it.
Update time off
Tap Manage Time Off on the home-screen banner to change the reason icon, the covered groups, or the end date.
- Adding a group declines its future events; removing one restores its auto-declined responses to “no response”.
- Moving the end date later declines the events that fall in the days you just added.
- Moving it earlier restores your responses for the days you just gave back, leaving the rest of the period untouched.
Closing the dialog with unsaved edits asks whether to save them first.
End-date reminder
When your end date is reached, the app sends a push notification reminding you to either deactivate time off or update the end date.
Deactivate time off
Tap Deactivate on the Time Off tab at any time. You can then join events and vote on activities again.
When you deactivate, all declined responses for future events within the time-off period are automatically removed in groups with Pro or Business tier — restoring them to “no response” so you can freely choose to join again.
Time Off does not automatically deactivate when the end date passes. You must manually deactivate it or update the end date.
profile-time-off-android.pngprofile-time-off-ios.png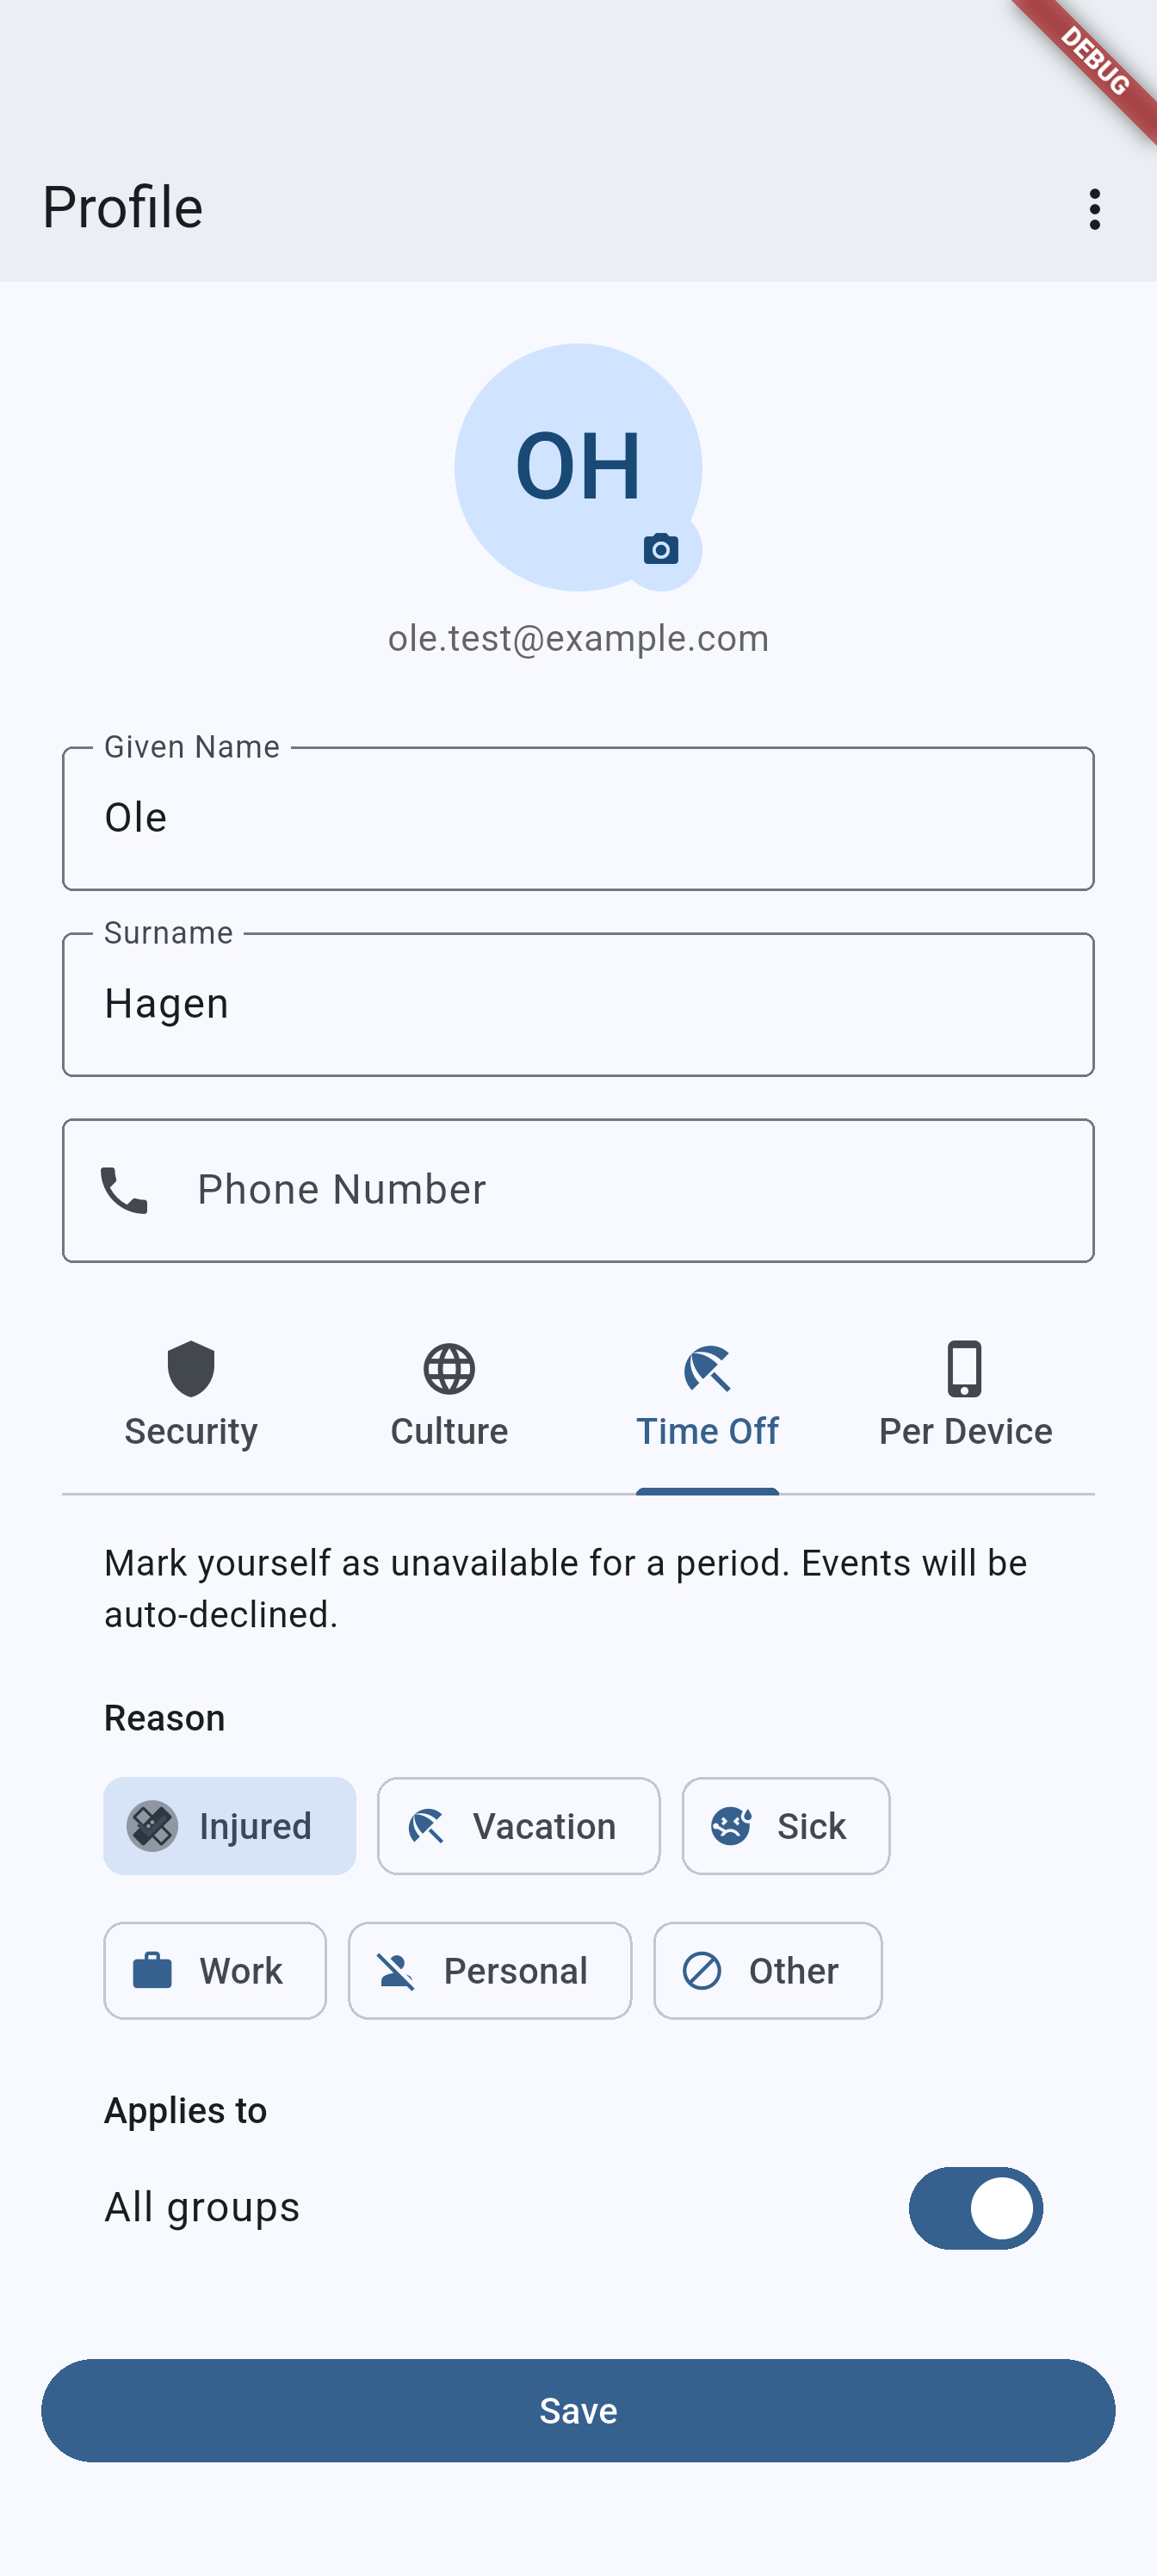
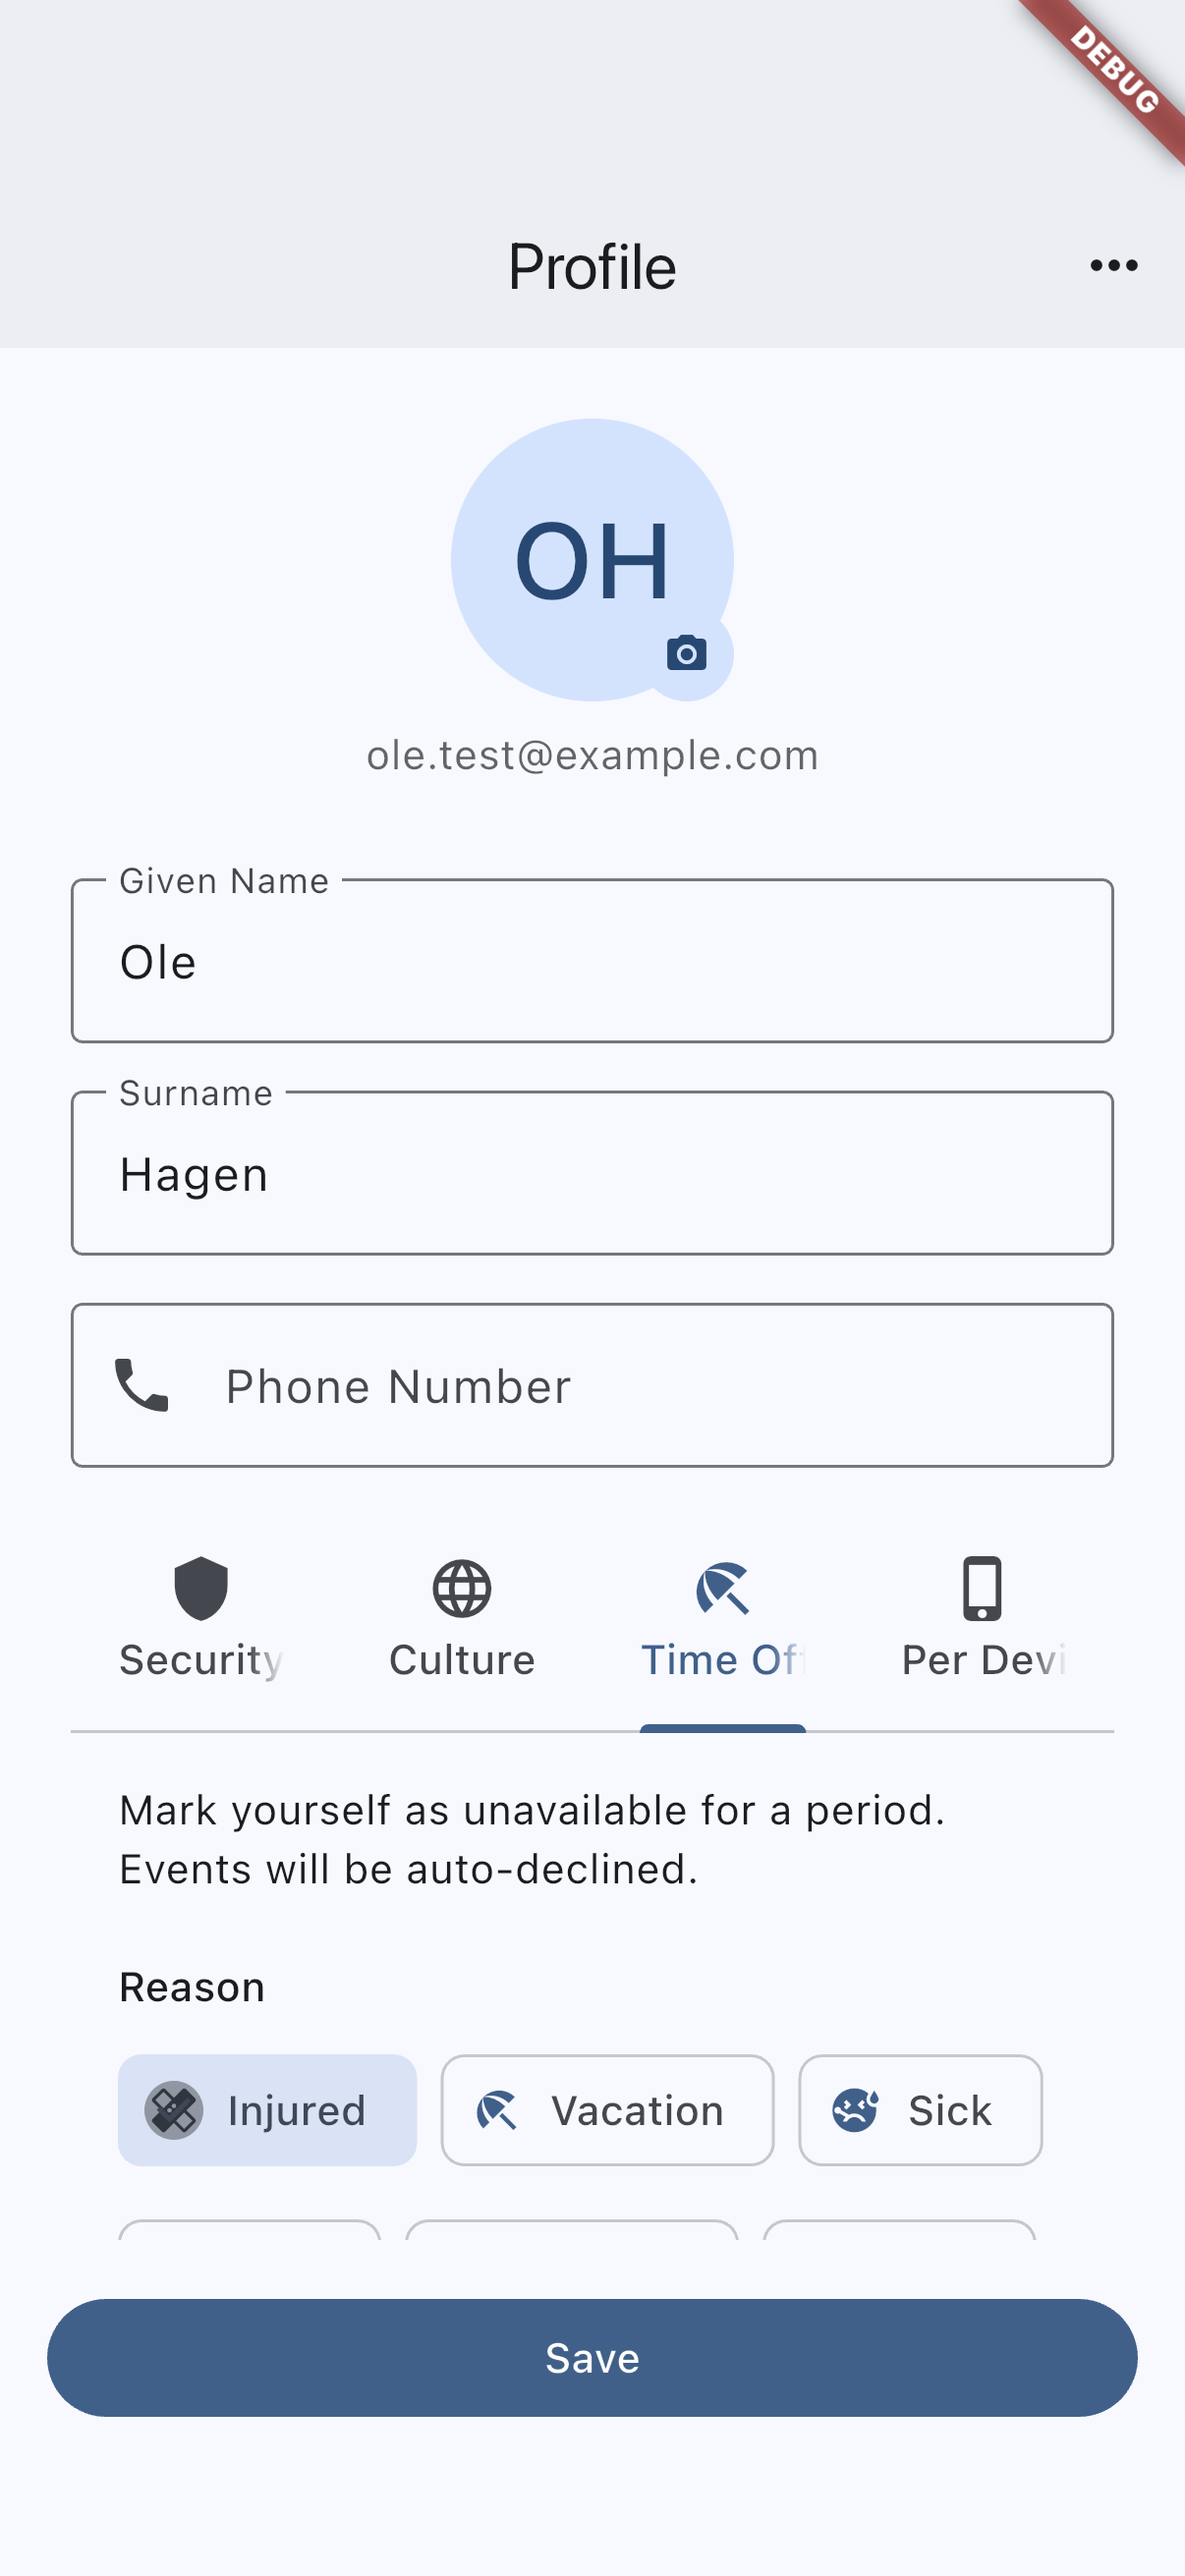
Recommended capture: the profile Time Off tab showing active state with reason chip, end date, and Deactivate button.
Admin: manage time off for a member
Group adminsGroup admins can activate, update, or end time off on behalf of a member directly from the Members tab.
- Open the team or group and go to Members.
- Tap the member’s name to open their profile sheet.
- Tap Manage Time Off.
- Choose a reason icon and an end date, then tap Activate Time Off — or, if time off is already active, tap Update or End Time Off.
Time off set by an admin covers only the admin’s own team or group: future events there are auto-declined on activation, and the member sees a time-off indicator in the roster. The member’s other teams and groups are not affected. The member gets a push notification and a notice on their home screen naming the team. When time off is ended, declined responses for future events are automatically reset. If the member set time off themselves for more than this team, the dialog shows it but only the member can change or end it.
admin-manage-time-off-android.pngadmin-manage-time-off-ios.png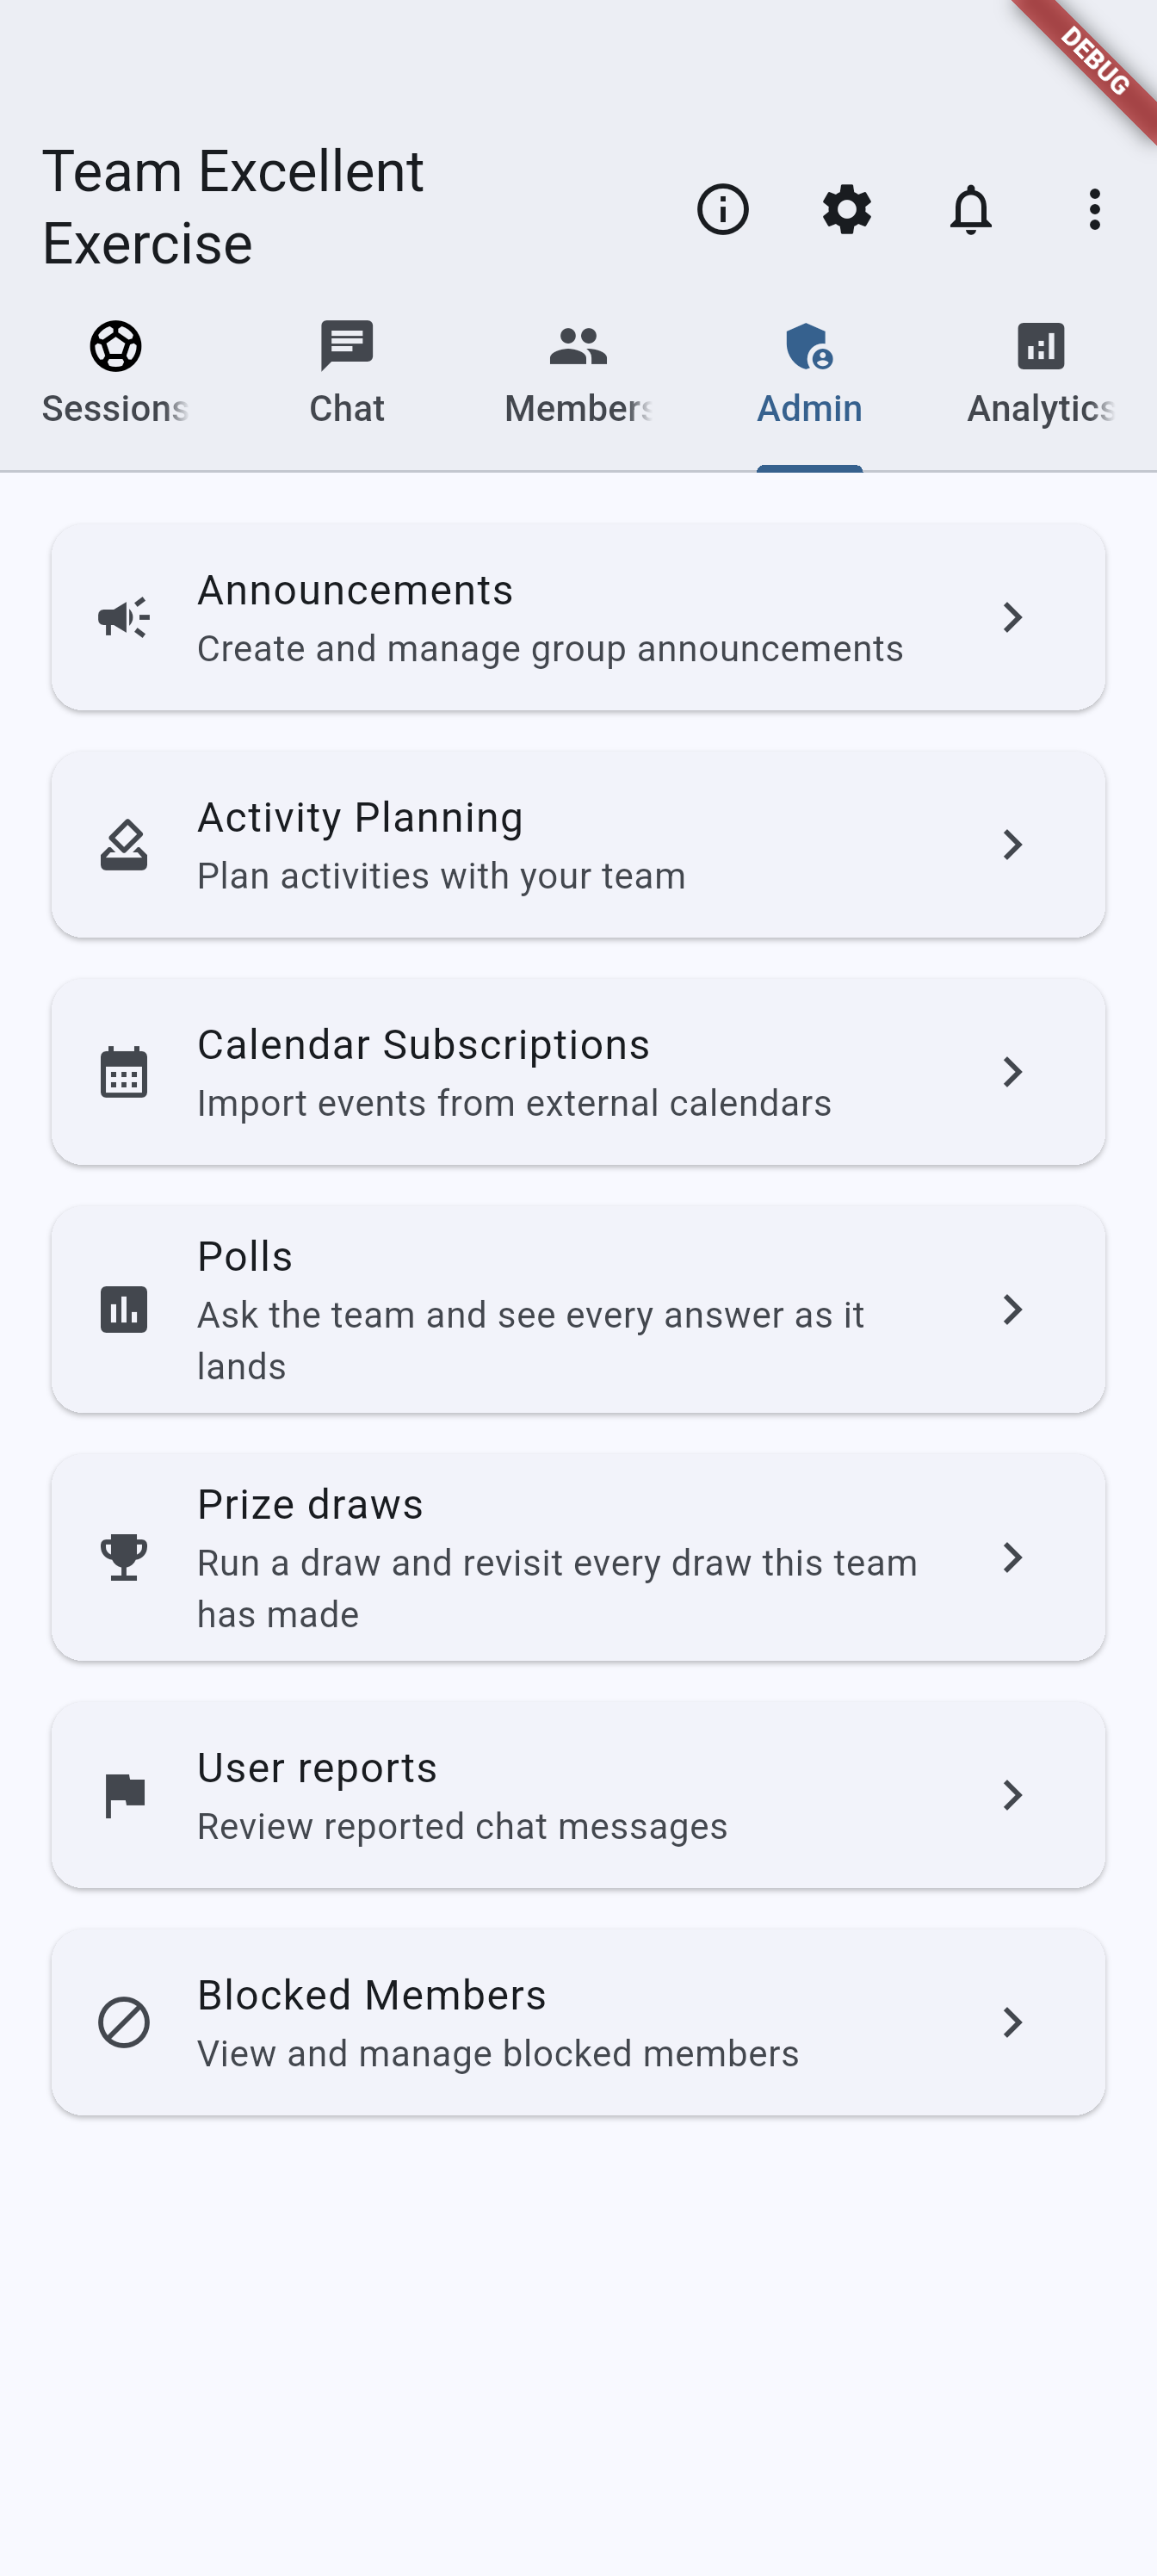
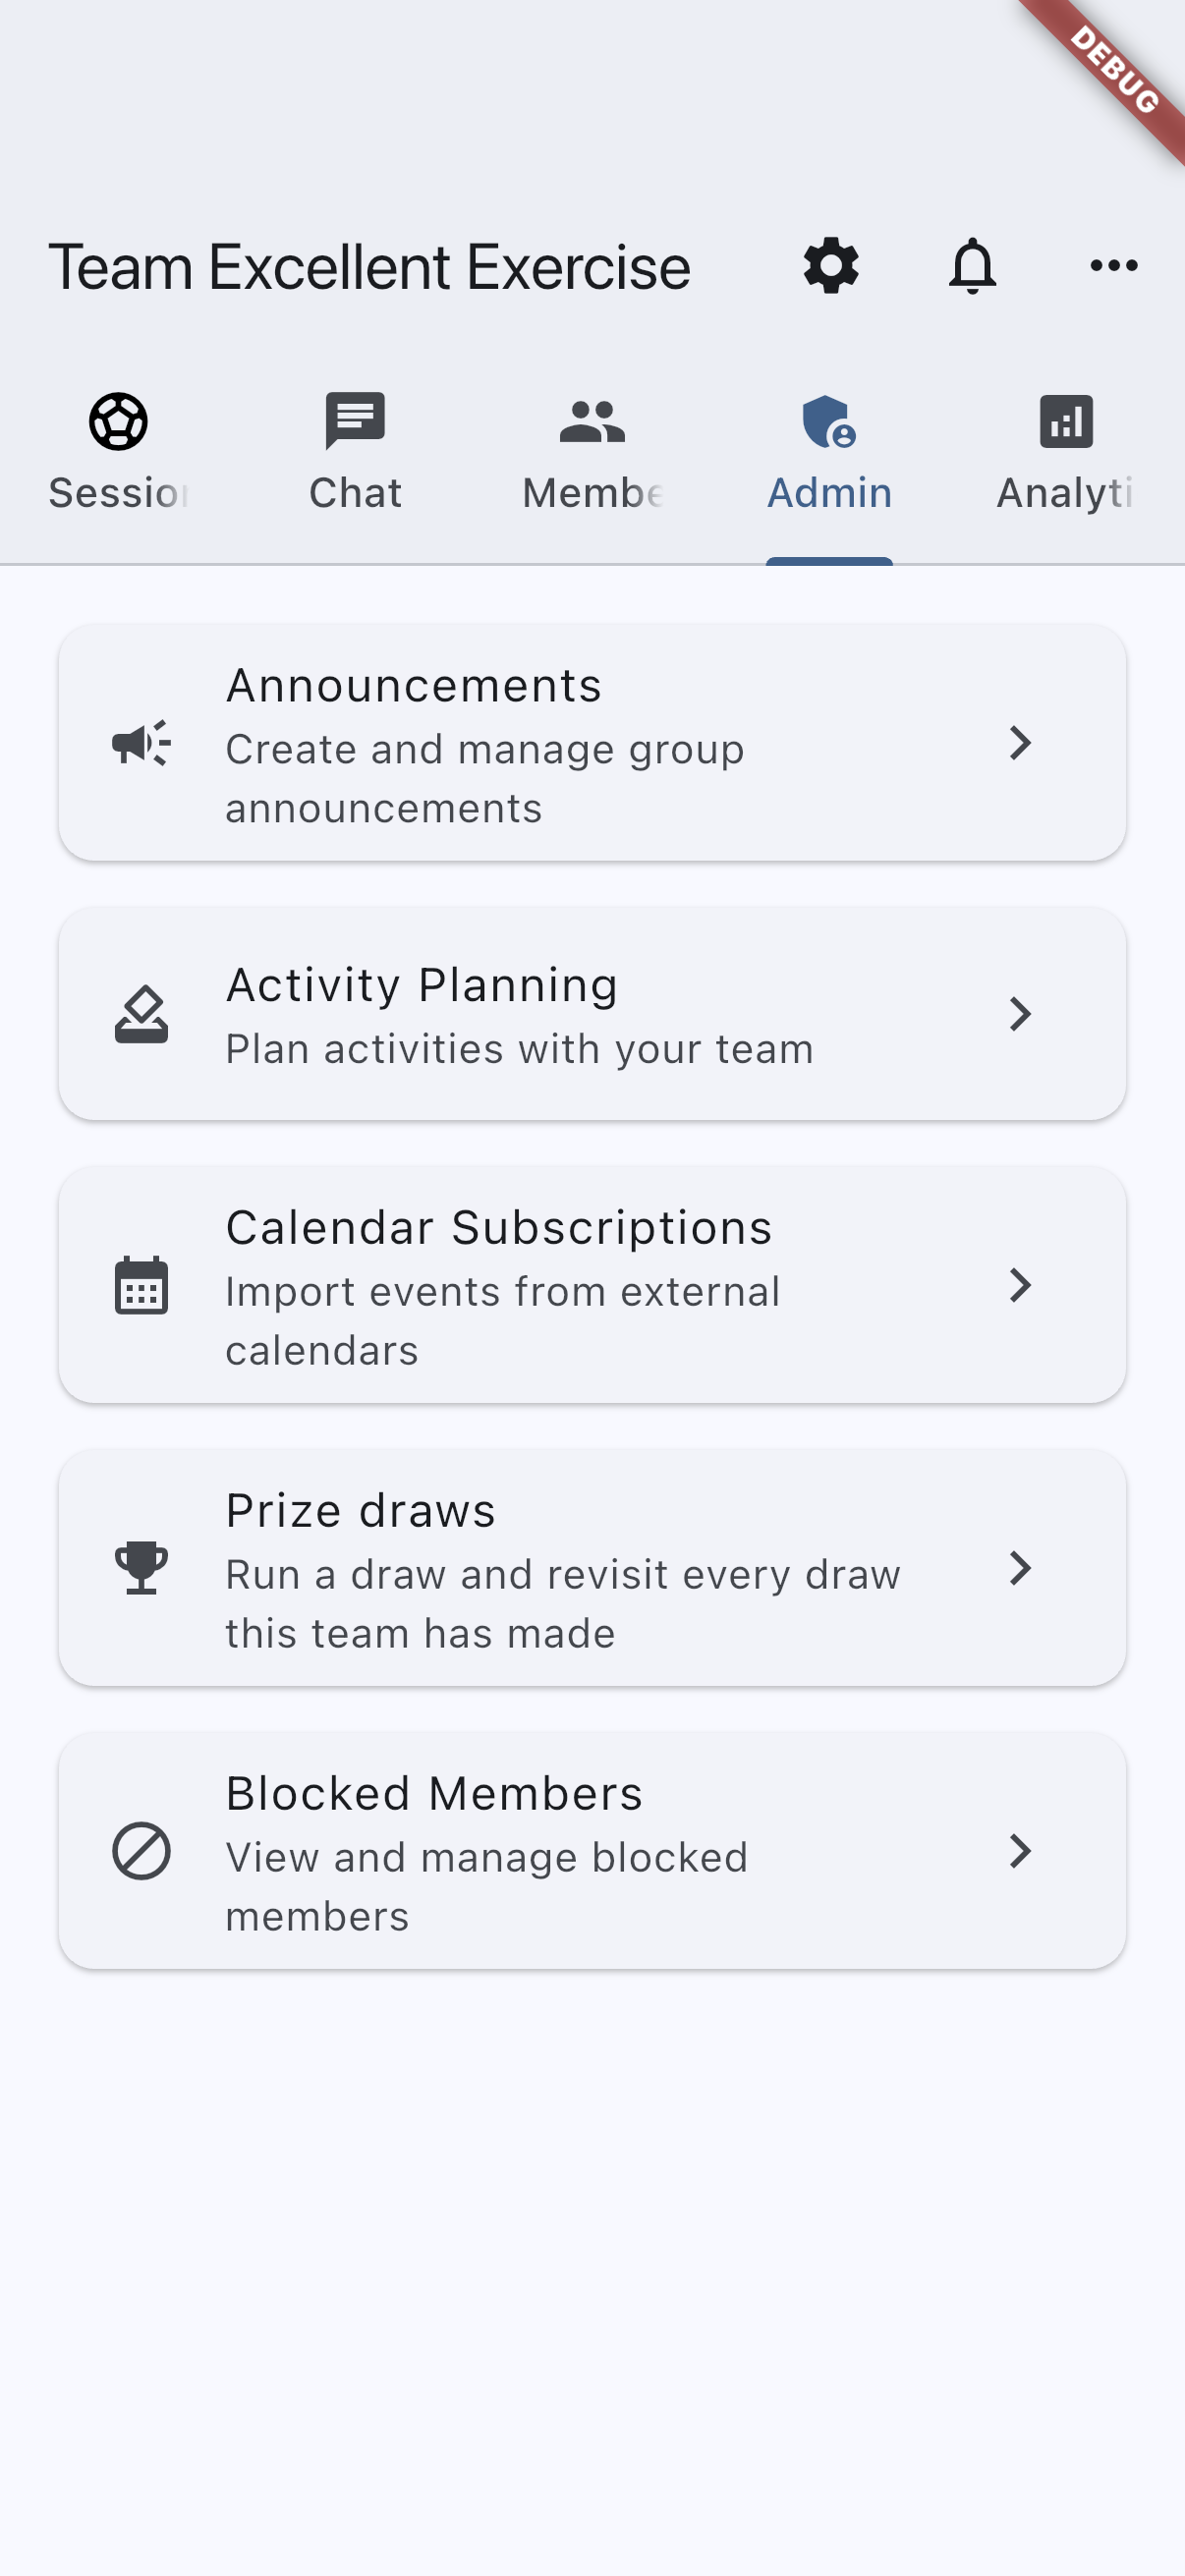
Recommended capture: the Edit Time Off dialog opened from the member profile sheet in the Members tab.
Per Device tab
Settings here apply only to this specific device and are saved to the server on profile save, so they are restored automatically the next time you log in on the same device.
The Per Device tab has three sub-tabs: Theme, Calendar, and Notifications. They appear as a compact sub-tab bar with an icon next to each label — the same sub-tab style used elsewhere in the app.
Theme sub-tab
App theme
Choose between light mode, dark mode, or following the device system setting.
Events to show
Controls how many upcoming events appear below the Next up block on the home screen feed. The Next up block always shows the first day that has events; this preference adds occurrences from days after that.
- None (default) — no extra events are shown.
- 1 – 5 — shows that many of the next individual occurrences.
- Following day / 2 days / 3 days / week — shows every occurrence whose date falls within that calendar-day window after the first event day.
When two or more occurrences are shown, they appear in a compact table. Four or more collapse to three rows with an expandable “+N more” link.
Calendar sub-tab
Turn on Sync to device calendar to copy upcoming event occurrences into a calendar on your device. Select which device calendar to sync into from the picker below the toggle.
On first login on a new device, the app may show a required calendar-sync setup dialog before you can continue. In that dialog:
- the toggle starts off,
- turning it on asks for calendar permission,
- and if sync is on you must select a calendar before continuing.
If permission is already granted and the device has no writable calendars, the app skips that startup dialog and stores sync as off for this device. You can later add a calendar account on the device and then finish setup from this Calendar sub-tab.
What gets synced:
- upcoming event occurrences,
- later updates to those same occurrences,
- and automatic removal of cancelled occurrences.
The app uses its own InOrOut calendar instead of mixing entries into an unrelated personal calendar. Save the profile to apply changes.
Calendar colour
When you sync into the app’s own InOrOut calendar, you can pick its colour from the swatches below the calendar picker. The colour applies to the whole calendar, so every synced entry takes it, and your calendar app will use it wherever those entries appear.
Two things to know:
- Changing the colour recolours the calendar. Your InOrOut calendar and its entries stay as they are. On the few phones whose calendar will not accept a new colour, the app removes its InOrOut calendar and creates it again in the new colour instead, and your synced entries are added back on the next sync — nothing of your own is touched.
- It only applies to the app’s own calendar. If you picked one of your own calendars in the picker instead, its colour belongs to whichever app owns it, and the sub-tab says so rather than offering swatches.
Events keep their colour and icon inside InOrOut, but device calendars cannot carry either. Phone and tablet calendars have no icon field at all, and on iOS every entry always takes its calendar’s colour. So a synced entry shows the calendar colour above — not the individual event’s colour, and no icon.
If your device currently has no writable calendars, the app keeps sync off and shows guidance in this sub-tab. After adding a calendar account in device settings, reopen this page and enable sync again.
Turning sync off removes the app-managed entries from your device calendar.
This is not just a visibility setting. When sync is turned off the app removes the calendar entries it previously placed on the device.
device-calendar-sync-android.pngdevice-calendar-sync-ios.png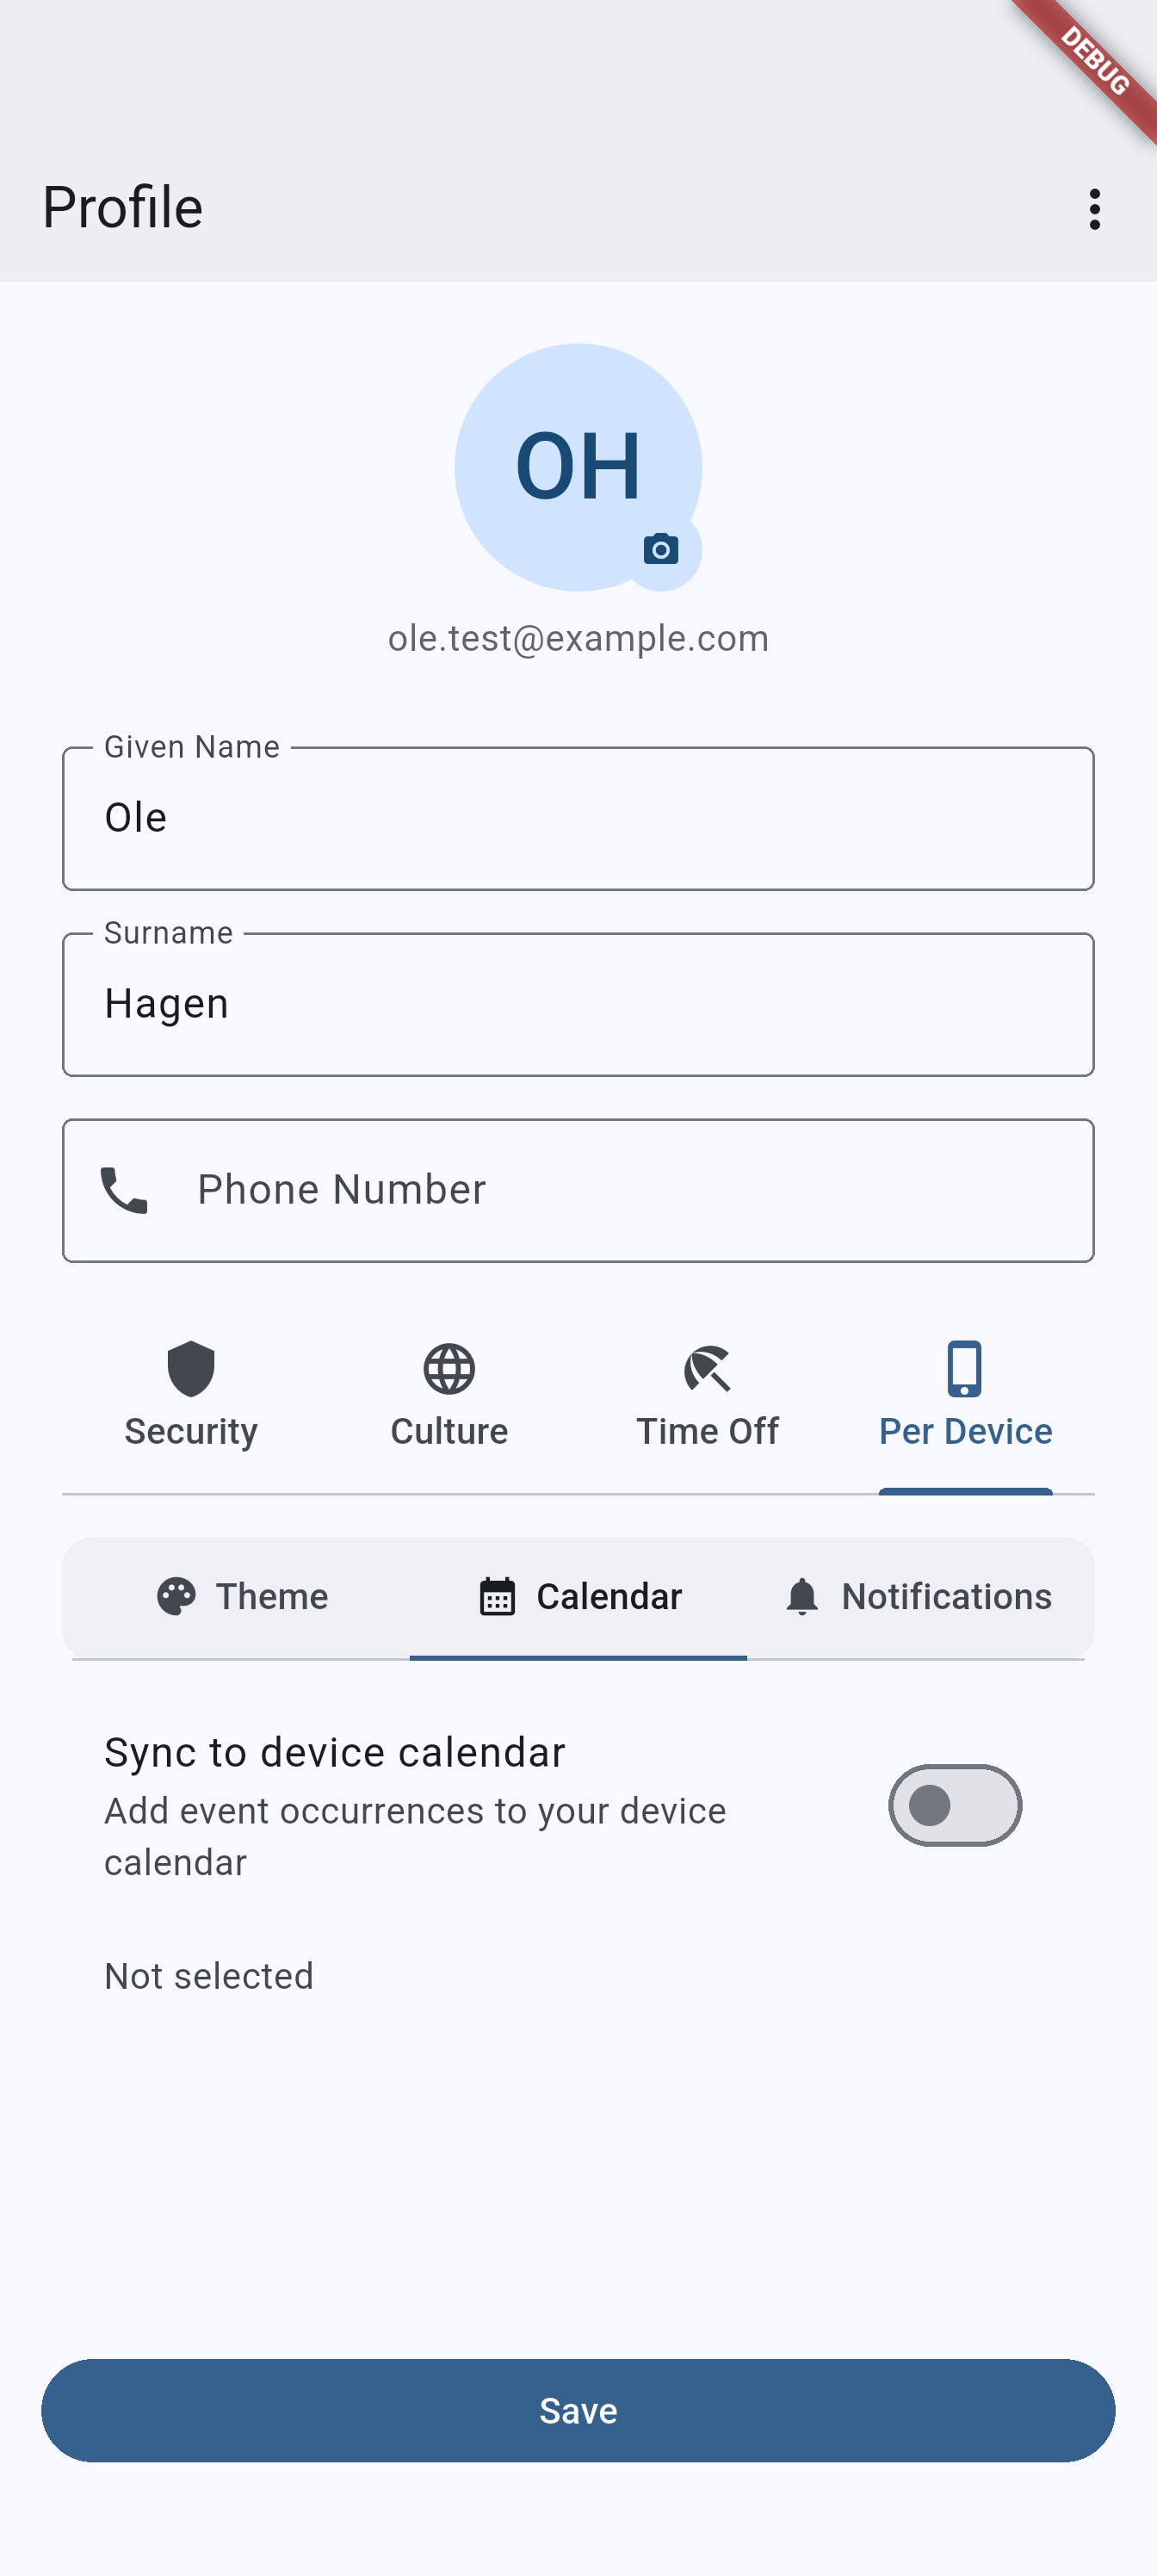
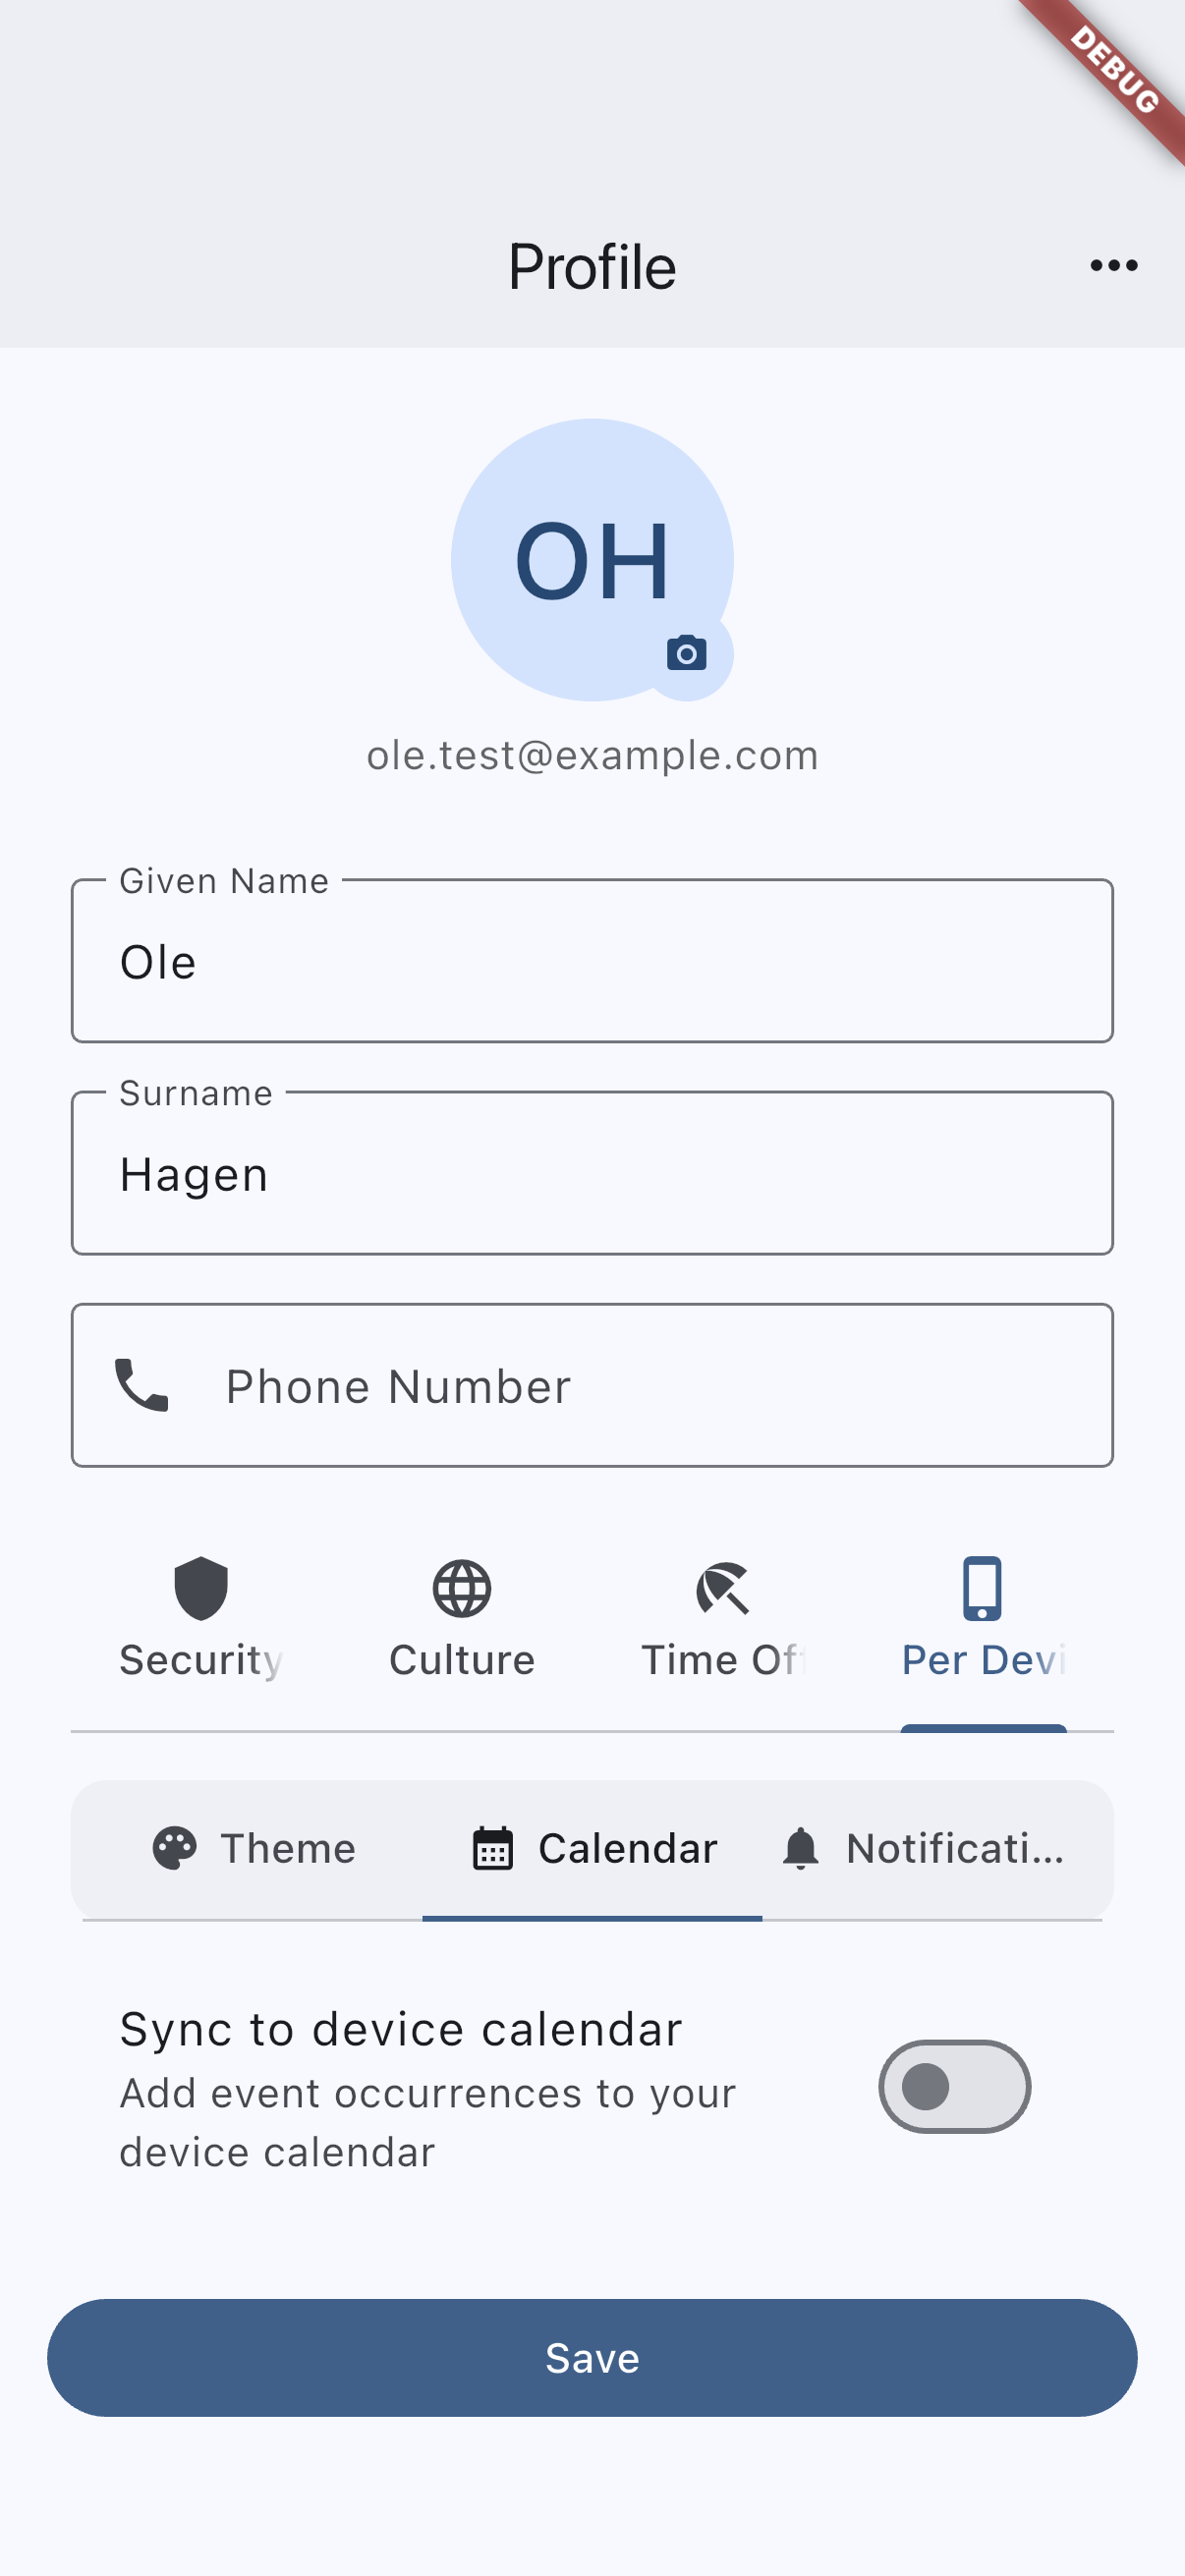
Recommended capture: the Per Device Calendar sub-tab showing the sync toggle and calendar picker.
Notifications sub-tab
A master switch and ten category toggles control which push notifications you receive on this device. See Notifications for the full breakdown of what each category covers.
Delete account
The delete account action is in the overflow menu (three-dot icon) at the top of the profile screen.
Deletion depends on membership and ownership. If you are the last admin of a group that still has other members, the app asks you to transfer that role before proceeding. If you are the last member of a group who can sign in, delete the group first.
- Open Profile and tap the three-dot menu at the top.
- Select Delete my account.
- Let the app run the deletion pre-check.
- If the app requires admin transfers, choose a new admin for each affected group.
- If you have an active store subscription, read the You have an active subscription reminder and decide whether to cancel it first.
- Confirm the deletion.
On success the app logs you out and returns you to the login screen.
Deleting your account erases your memberships, RSVPs, votes, chat messages and profile. What you created for your teams and groups stays with them, without your name: events, activity plannings, polls, announcements, calendar subscriptions, prize draws, and the Forum posts members could already read, which then show as from a Former member. Forum submissions still waiting for review, declined or removed are deleted. The Privacy Policy has the full list.
The app will not delete accounts that still have unresolved admin-transfer requirements.
A Coach Pass or group subscription bought through the App Store or Google Play keeps billing you until you cancel it in the store — deletion cannot do that for you. The app shows this reminder during the deletion flow when it finds an active subscription, and we send a follow-up email after the account is gone. Cancel from Settings → your name → Subscriptions on iOS, or Google Play → Profile → Payments and subscriptions → Subscriptions on Android. See Request profile deletion.
Related pages
- Getting started for the forgot-password flow if you cannot sign in.
- Notifications for push-notification categories and translated email behavior tied to your profile language.
- Events and attendance for device calendar sync and time-off effects on participation.
- Plans and billing for the tier rules behind features like Time Off and custom avatars.