Teams and groups
Members Group adminsInOrOut uses the same general group-detail experience for both teams and groups. The language changes, but the core workflow is similar: events, members, optional chat, admin tools, and analytics.
Join or create a container
- Create a team or group from the + button menu on the home screen.
- Search for public teams through the same menu or the empty-state prompt.
- Join private teams by invite code (via the + menu or the empty-state prompt), direct invitation, or join-request flow.
An invite code is eight characters, using only letters and digits that cannot be mistaken for one another — no I, L, O or U — so it survives being read aloud or copied off a poster.
When you create a new team or group from the + menu, you choose the type, pick an icon and color, enter a name, optionally add a short description and a location, and decide whether it should be public or private.
Tapping the icon opens a picker where the icons are split by kind — sports for teams, activities for groups, with the other set one tap away in an expandable section. Type in the search box at the top to filter across both sets at once by name, and use the label button in the dialog title to show the names under the tiles. The colour circle in the lower-left corner sets the colour the icon is drawn in. The catalog covers sports and social occasions alike, from boxing and climbing to quiz nights, cabin trips and work parties.
The switch is labelled Public Team / Public Group and is on by default: anyone with the invite code can join, and the team can be found through search and Discover. Turning it off makes the team private — only invited members can join — and requires Pro or higher, so on a free plan the switch is locked on.
Location and Discover
Below the description you can set a location for the team or group. It works the same way as the location on an event: type an address by hand, or tap the map button to pick a point, which also stores its coordinates. The field also lists the places the team has used before, and the team’s own location leads that list wherever a location is entered inside the team.
Teams and groups that are public and have a location set can be found by other users through the Discover tab on the home screen. A Discover status line under the field tells you where you stand right now:
- Discoverable — the team is public and its location has coordinates.
- Not discoverable — private — switch the team to public to be listed.
- Not discoverable — no location set — the location field is empty.
- Not discoverable — pick the location on the map — an address was typed by hand, so it has no coordinates. Discover searches within a radius, so it needs a point on the map.
The individual sessions and activities you run can be listed in Discover too, but they carry extra conditions of their own — see Public sessions and Discover. The same goes for events imported from an external calendar; see Show imported events in Discover.
The location set here is also the starting point for anything new you create inside the team: a new session, a new activity planning, or a new calendar subscription all open with this address already filled in. Change it on the individual item when it happens somewhere else.
Search for an existing team or group
Choosing Search for existing Teams & Groups and Events — from the + menu or the empty-state prompt — opens the full-screen search page with its filter on All, searching teams, groups and events at once. The filter sits at the top of the page; narrow it to Teams & Groups or Events to search one kind. Type at least two characters and matches appear as you type; the search runs on the team name or event title, and a dropdown above the search field lets you choose how it matches: contains (the default), starts with, ends with, or an exact match.
When the filter includes events, two date boxes appear for searching by day or period. See Events and attendance for the event side of the page.
Each result shows the selected icon, the current member count, and the location if one is set. If the team or group has a description, tap the row to expand it before sending the join request.
Only teams you could actually join are listed: your own teams, private teams, and any team that has blocked you never appear. The same goes for the event side of the page — events at teams you are already in, or have asked to join, are left out, so the results are only things that are new to you. The page returns at most 20 matches at a time, and tells you when there were more so you can narrow the search.
Tap the join icon on a row to ask to join. What happens next depends on how the team is configured:
- Most teams queue your request for an admin. The row switches to Pending approval and the team shows up under your pending requests on the home screen.
- Teams with Auto-accept join requests turned on add you straight away. The row is marked as joined, and you can tap it to open the team.
The page stays open either way, so you can send requests to several teams in one visit without searching again.
A request you have sent is not final. Pending requests are collected under My requests on the home screen’s Teams & Groups tab, each marked Pending approval; open the one you have changed your mind about and choose Withdraw request to take it back before an admin gets to it.
Understand the group detail tabs
Depending on your role and the group configuration, you may see:
- Events for scheduled sessions, activities and Info events. It is split into Agenda, Calendar, and Events sub-tabs, and each sub-tab has a filter of its own — see Events and attendance.
- Chat when chat is enabled for that group.
- Forum on a Business team that has it switched on — questions and suggestions from members, curated by the admins. See Forum.
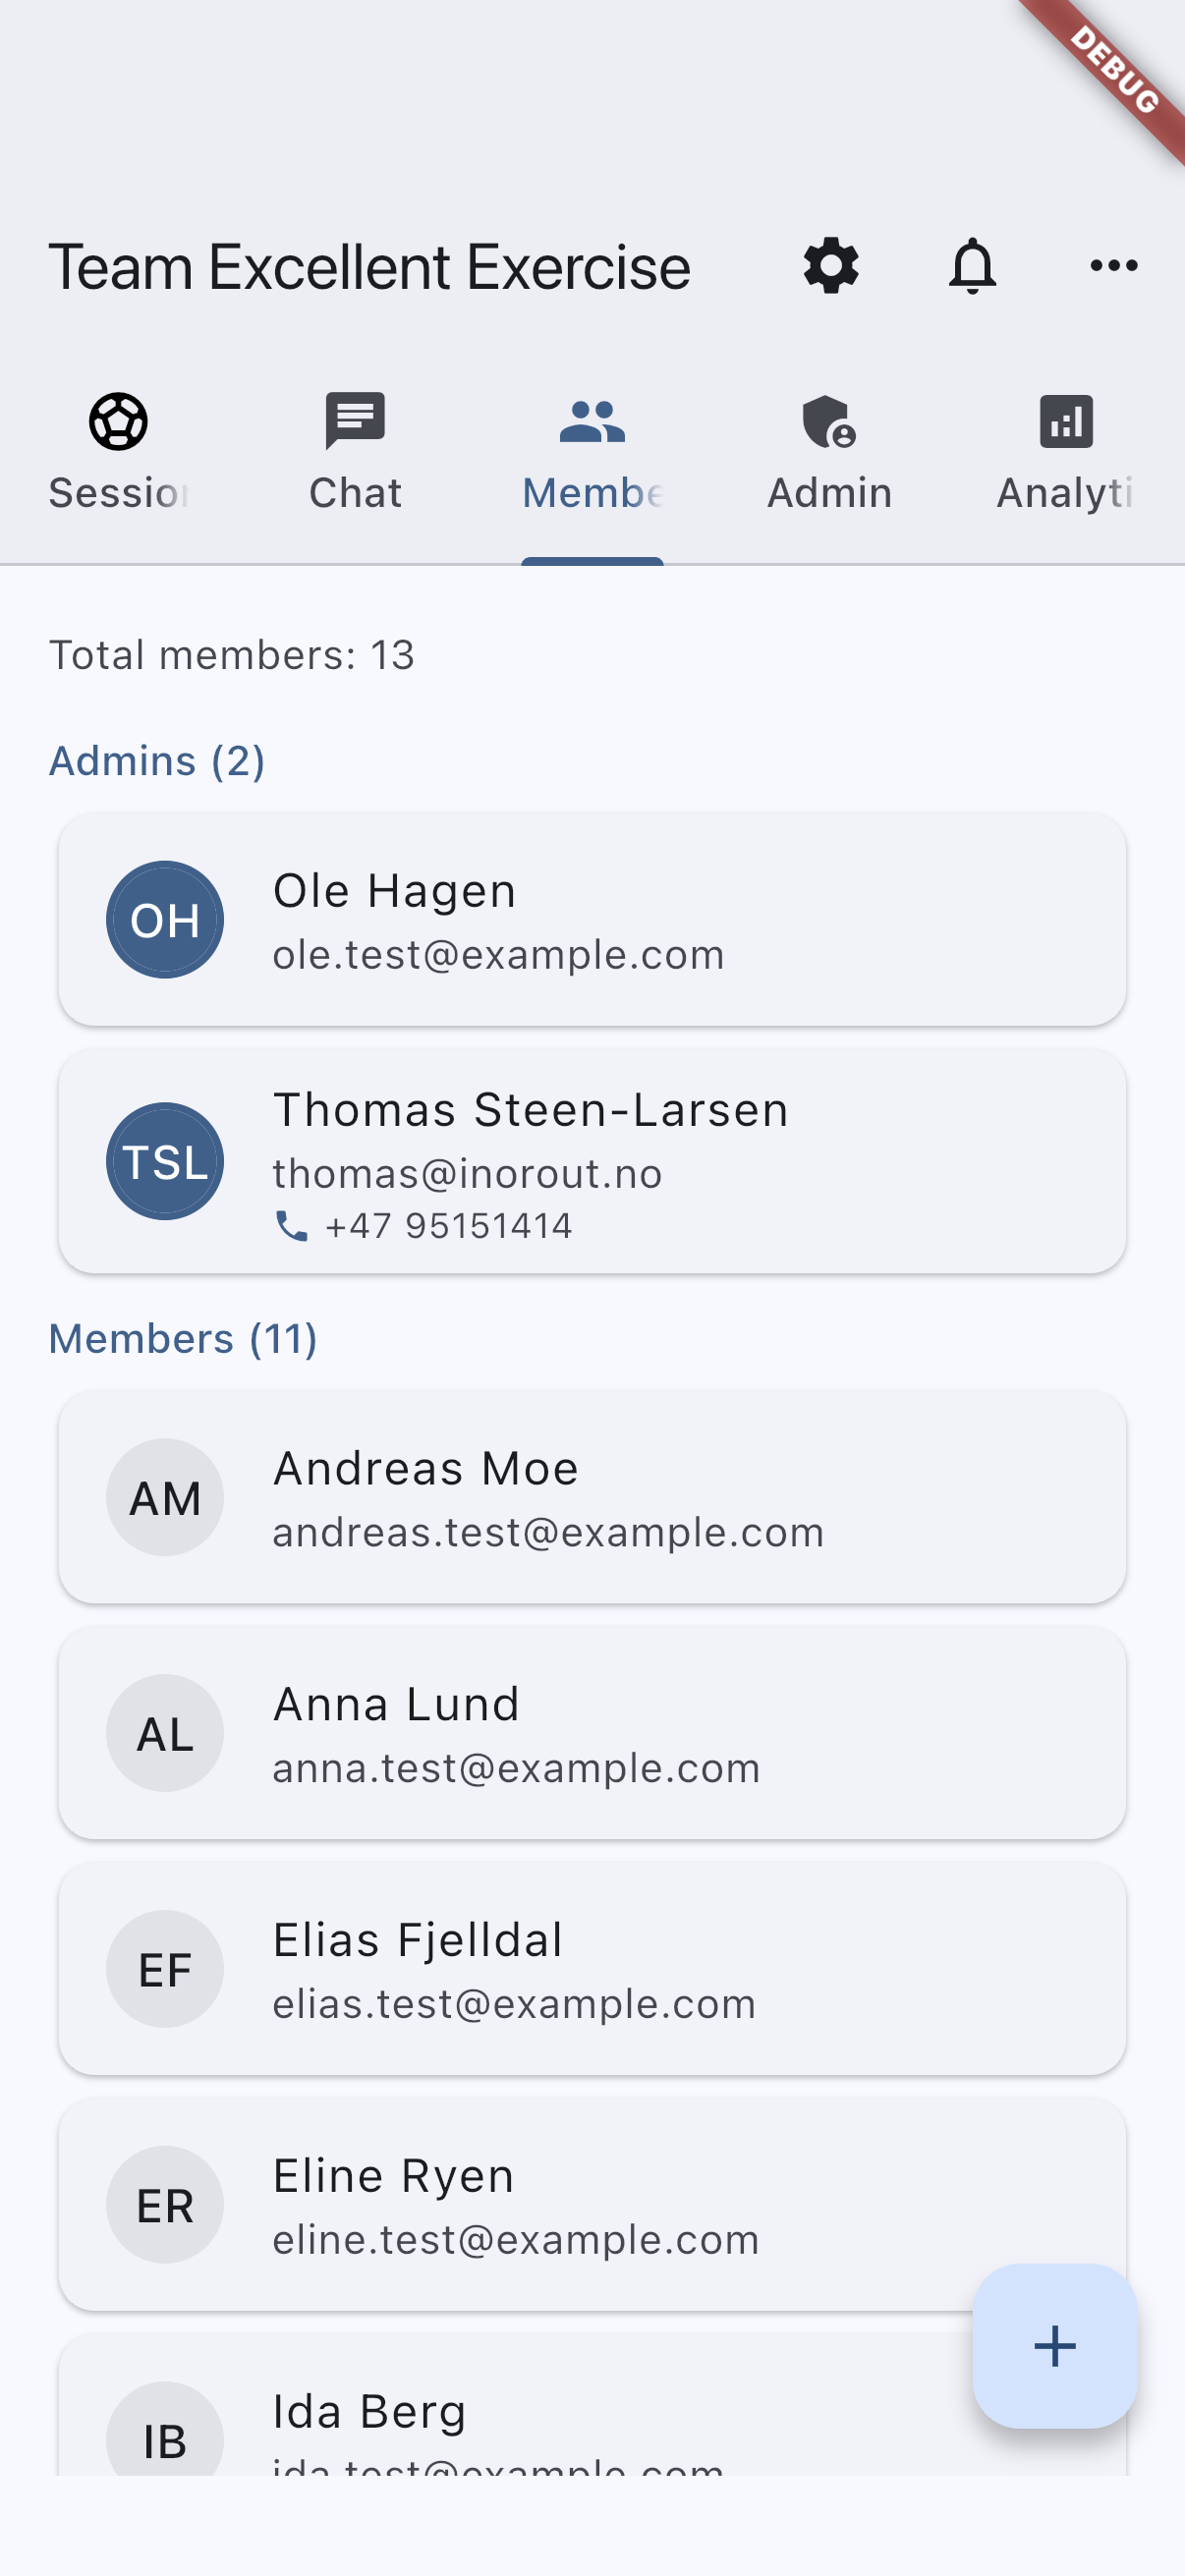
- Members for roster and invite management. A team can hide the roster from its members — see Group settings.
- Admin for announcements, activity planning, and calendar subscriptions.
- Analytics for admin-only reporting.
Group settings
Group adminsThe settings screen has five tabs.
Security tab:
- Public team/group — on by default. Turning it off makes the team private and requires Pro or higher.
- Auto-accept join requests — when this is on, any join request from a new user is automatically approved without admin review. When it is off, admins must approve each request manually. This setting requires Pro or higher and is automatically disabled for private groups (which cannot receive join requests at all). Enabling this also bulk-approves any requests already pending.
Features tab:
Thirteen switches, grouped by what the feature is for rather than by which plan unlocks it. The three groups are sub-tabs — Communication, Planning and Events — so the tab opens on Communication and you pick the group rather than scrolling past it. A switch only ever takes a capability away from the team — it can never grant one the plan does not already include — so a feature your plan does not cover is shown with a padlock, reads as off, and cannot be flipped.
Communication
- Chat — real-time group chat. The only switch on the tab with no plan requirement: chat is included on every plan, so this one is always yours to set.
- Announcements — lets admins post announcements to everyone in the team. Requires Pro or higher.
- Forum — members submit questions and suggestions for admins to curate and the team to upvote. Requires Business. Switched off here, the Forum tab disappears for everyone and the posts are kept until it is switched back on — see Forum.
Planning
- Decision deadlines — confirms or cancels an event against its minimum attendance when the deadline passes. Requires Pro or higher. Switched off here, the deadline field disappears from the event form.
- Activity planning — plan activities by asking members when they can attend. Requires Pro or higher.
- Recurring activity planning — indented under activity planning, because it is the same feature run by a standing rule: attach one to a repeating session or a calendar subscription and it makes a planning per upcoming session. Requires Business. It dims rather than disappearing when activity planning is off, so your choice is where you left it when you turn activity planning back on, and switching it off leaves plannings you made by hand alone.
- Directly under it sit Plan activities from and Plan activities until, the hours of the day a generated activity may start in. A date the rule works out that falls outside them is dropped, and a session left with fewer than two dates gets no planning at all — which is how a rule avoids proposing one o’clock in the morning. The hours are the team’s, so every rule uses them; the end time must be later than the start time.
- Polls — put a question with answer options on the agenda. Requires Pro or higher. Switching it off takes the Business poll extras with it, since they are part of the same feature the team just declined — see Polls.
- Waiting list — offers freed spots to members queuing for a place. Requires Business.
- Directly under the waiting-list switch sit Offers start from and Offers stop at, the daily window offers are allowed to go out in. A spot that opens outside the window is reserved straight away, but the offer and its confirmation clock wait until the window reopens, so nobody is woken at 03:00. The end time must be later than the start time. Both follow the waiting-list switch: locked by plan or simply switched off, they go inert.
Events
- Attendance confirmation — lets admins confirm who actually turned up. Requires Business.
- Check-in — indented under attendance confirmation, because check-in is a way of recording attendance rather than a feature of its own. It has no plan flag of its own: it inherits the attendance requirement and is only live while attendance confirmation is on. Switching check-in off closes the door — QR self check-in and the staffed live desk — and leaves the attendance screen working, so admins can still mark people present by hand. The switch dims rather than disappearing when attendance confirmation is off, so your choice is where you left it when you turn attendance back on.
- Guests — lets members bring guests to events. Requires Pro or higher. Switched off here, the Guests allowed switch disappears from the event form and the calendar subscription wizard, and members cannot add guests; guests already registered still count.
- Prize draws — draw winners among participants, members, or the people who answered a poll. Requires Business. This is a flag of its own rather than part of attendance, so a team that switches attendance confirmation off keeps its raffle.
- Analytics — attendance and participation statistics. Requires Business.
Member features tab:
Everything an ordinary member is allowed to do. The Security tab decides who gets in; this decides what they may do once they are. None of these switches has a plan requirement of its own — but the feature behind one still does, so switching Quick Quizzes on in a team without polls changes nothing.
- Allow member invites — when this is on (the default), regular members also see invite options in the Members tab. When it is off, only group admins can invite.
- Allow member-created events — off by default. When it is on, any member can add events to the team, not just admins. A member who creates an event can also edit, cancel and delete it afterwards — but not run it: confirming attendance, opening check-in and managing the roster stay with the admins.
- Allow advanced options — indented under member-created events and inert while that is off. Off by default, so members get the plain form: title, description, place, time and the participant minimum and maximum. Switch it on and they get the whole form — repeats, waiting list, reminders, doors-open and the draft lifecycle. Turning member-created events off takes this with it, so switching events back on never quietly restores the advanced form.
- Allow member Quick Quizzes — on by default, so a team that has polls can use them from the start. Any member can ask the team one question with a right answer; see Quick Quiz. It reads as off with a padlock when the team has no polls, since a Quick Quiz is a poll.
Member handling tab: Business
Three switches deciding what regular members are shown of each other. Admins always see both lists in full, whatever is set here.
Members tab
- Show members — on by default. When you turn it off, members see only the team’s admins and the total member count instead of the full roster. Admins are never hidden, so there is always somebody to contact.
Events
- Show participants — on by default. When you turn it off, members still see how many are coming, the capacity gauge, and their own answer, but not who the others are. Activity planning is unaffected: comparing who can make which date is the whole point of it.
- Decide per event — off by default. Turning it on adds a Show participants switch to the event form, so a single event can differ from the team’s setting. Turning it back off puts every event under the team setting again without losing what each event had chosen.
These three behave differently from the Features tab in one way worth knowing: the setting outlives the subscription. If the plan lapses, a team keeps the roster it hid — privacy that expired with a card would publish members who never agreed to it. You can always switch a list back on; only hiding one needs Business.
Custom Profile tab: Business
The team’s public face, beyond the icon and colour every team has:
Both pictures are edited on the card itself — the real Discover row, with the team’s own name and details — rather than above a separate preview of it, so a change lands where you can see it.
- Profile image — an uploaded picture, cropped square, drawn as a rounded square wherever the team appears: the app bar of the team page, Discover and search results, the home list, invites, and join requests. It also stands in for the activity icon on the team’s event cards, so a session the organiser gave no icon of its own carries the team’s mark instead — an icon picked for a particular session still wins. It replaces the icon circle every unbranded team gets, because a logo is rarely round. It also brands the printable sheets — the check-in poster’s footer, and the poll and prize-draw result headers.
- Banner image — a wide picture, cropped 3:1. It sits on the team’s card in Discover and search, and on the team’s own cards in the home list. The arrow in its corner moves it between the bottom of the card and the top, where it reads as a cover photo and shows even before the card is expanded. A banner with transparency in it — a logo on a clear background — is drawn on the team’s page background wherever it appears, so it meets the team’s own colour rather than whatever happens to be under it.
- Show the banner at the top of the page — with this on, the banner also heads the team’s own pages, between the app bar and the tabs. Turn it off to keep the banner to the cards strangers see.
- Text colour and Page background — the colours the team’s own pages are drawn in. Pick from the swatches or type a
#RRGGBBvalue of your own. The default swatch means the app’s own colours. The background also goes behind the banner, and it surrounds the sub-tab strip without running under it, so the tabs stay readable. The text colour reaches what is written on the page itself — headings, empty lists, the search field, the filters — and stops at the app’s own surfaces: cards, chat bubbles, the app bar’s buttons, and anything opened on top of the page, such as a sheet or a dialog, keep the app’s colours so they stay readable whatever the team picks. Both colours follow the admin tools too: announcements, activity planning, calendar subscriptions, polls, prize draws, user reports and blocked members are drawn in the team’s colours rather than the app’s grey, empty lists and their icons included. - Contact info — an email address and a phone number, both optional. They appear on the team’s info sheet as tappable rows that open mail or a call.
- Links — press Add link and pick a platform: the team’s homepage and web shop, the social networks (Facebook, Instagram, X, Threads, Bluesky, Mastodon, Snapchat, TikTok, Pinterest, Reddit, LinkedIn), video (YouTube, Vimeo, Twitch), music (Spotify, Tidal, Bandcamp, SoundCloud), or a community (Discord, Slack, Strava, Kickstarter). Each address must be a full
https://one. There is also a custom link, which you title yourself — for anything the list does not cover, such as a Vipps or Spleis page. A team can have as many custom links as it likes, and only one of each named platform. Drag a link by its handle to change the order members see, and press the cross to remove it.
The links appear on the team’s info sheet, which anyone can open from the banner, from the team page’s header, or from the About button on the expanded Discover or search card. Each is one line — its icon and its name, in the order you dragged them into — and tapping one opens it; the address itself is not printed, so a long list still fits. The sheet shows the banner, the profile image, the description, the contact rows, and — for a team that set a location with a pin — an expandable map.
A Slack invite link expires and a Kickstarter campaign ends, so those two are worth checking now and then — nothing removes a link that has gone stale.
Everything on the tab saves with the rest of the settings when you press Save — the two pictures, the banner’s placement and page switch, the colours, the contact fields and the links. A picture you pick is cropped straight away and shown on the card, but it is only uploaded when you save; if you leave without saving, the app asks first, and Discard leaves the team as it was. If the plan lapses, the branding stops being shown but nothing is deleted — it all comes back if the team returns to Business, and you can always remove an image or clear a field in the meantime.
group-custom-profile-android.pnggroup-custom-profile-ios.png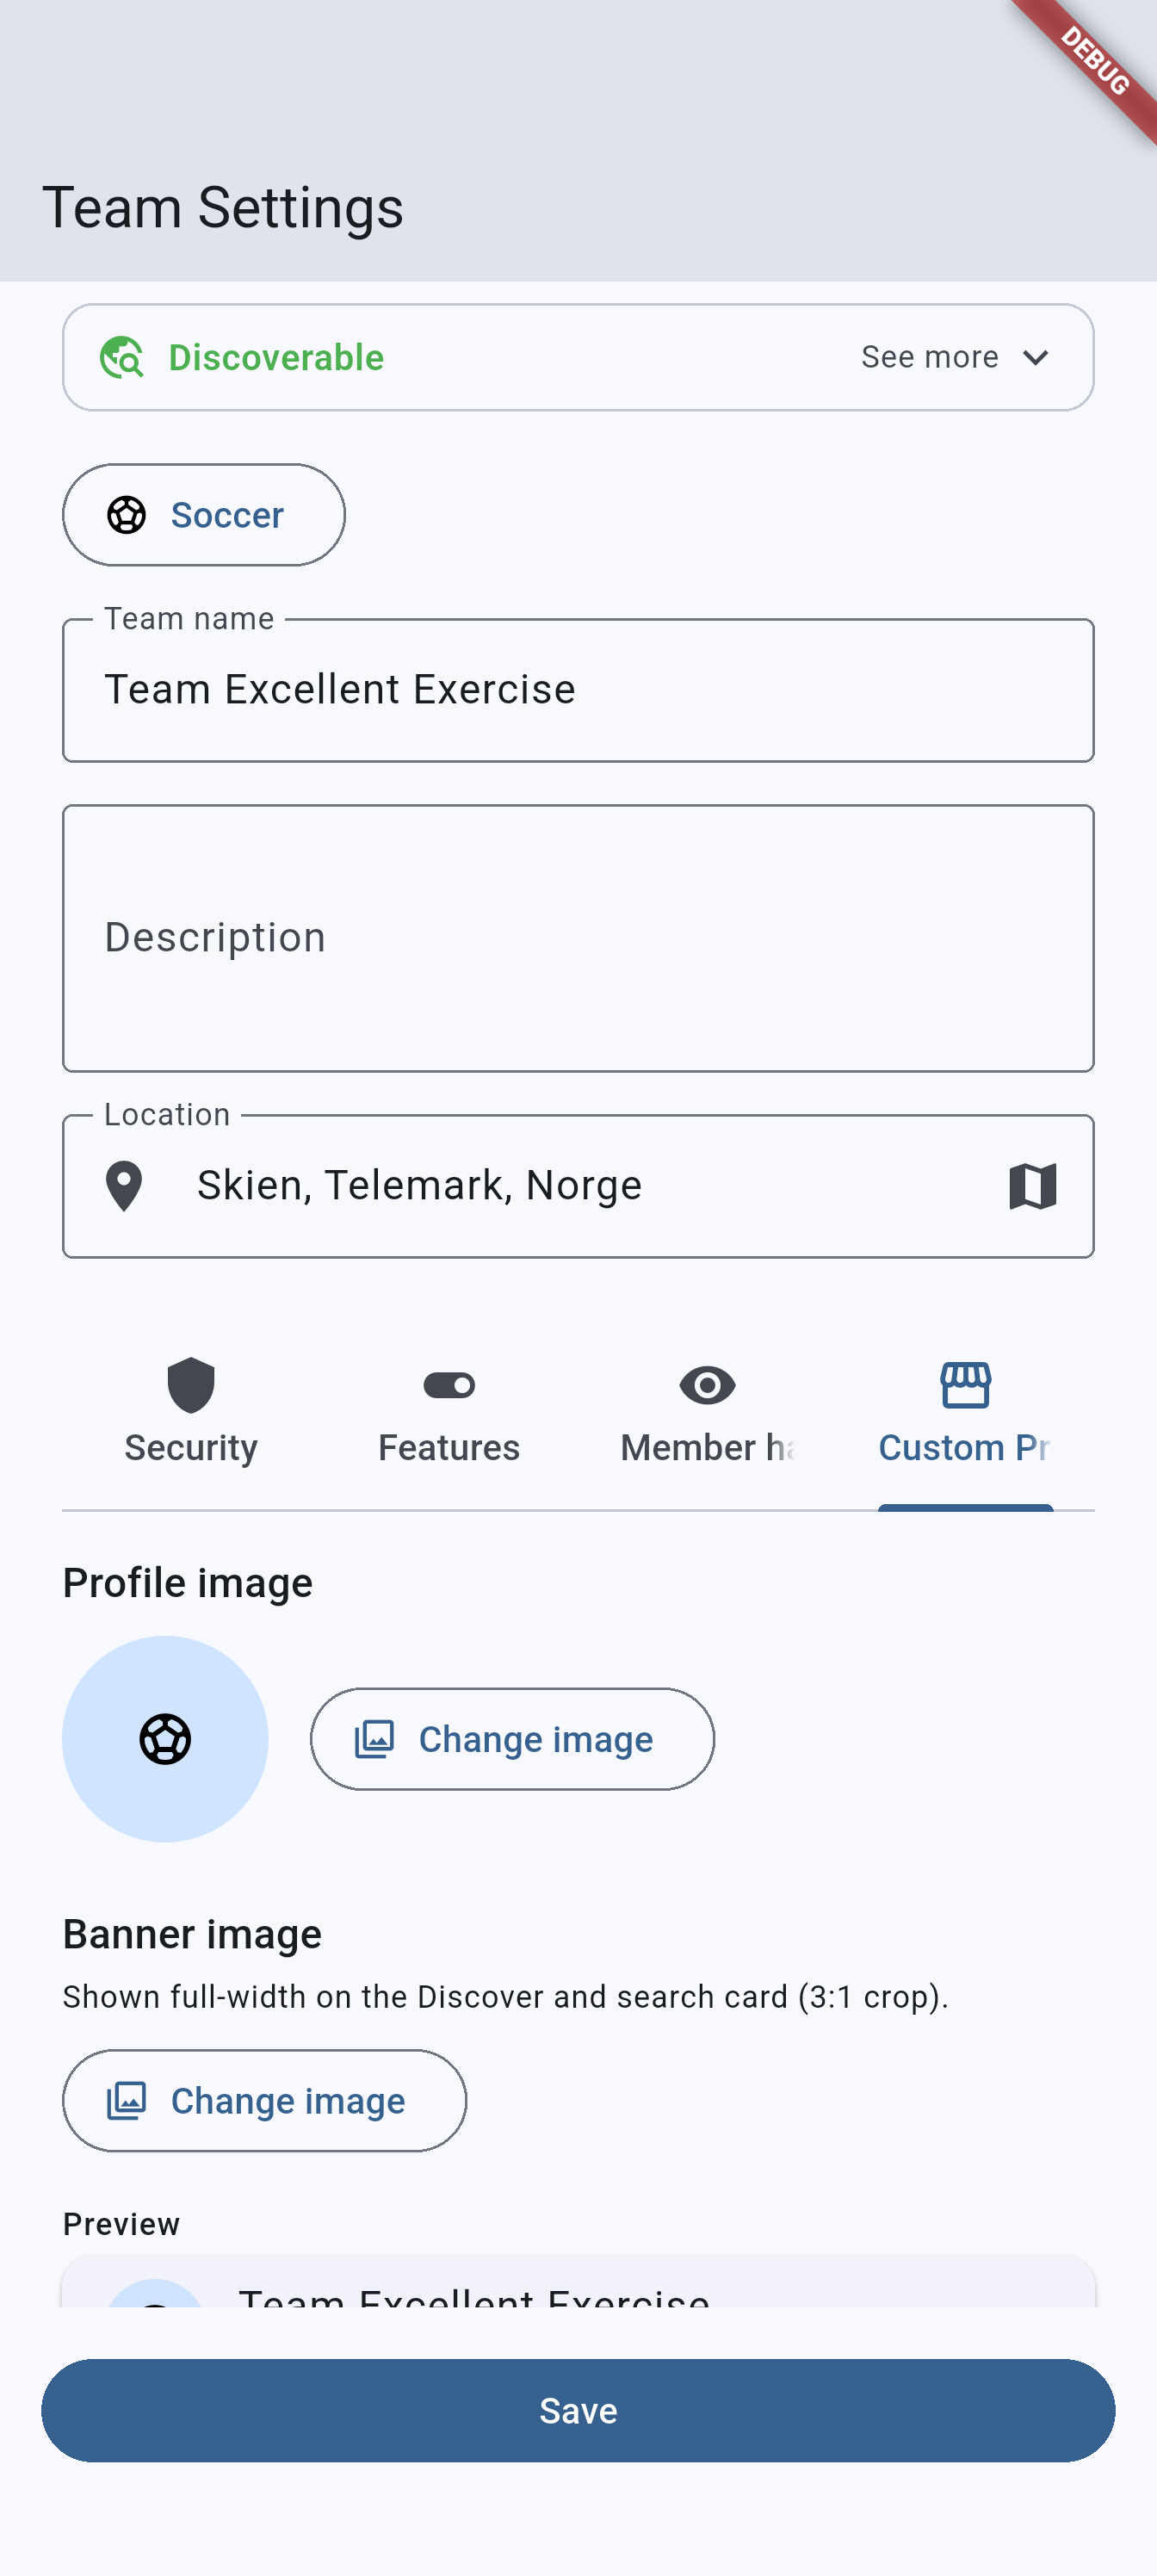

Recommended capture: the Custom Profile tab with the editable card, the banner placement arrow, the colour swatches, and the contact and link fields.
group-info-sheet-android.pnggroup-info-sheet-ios.png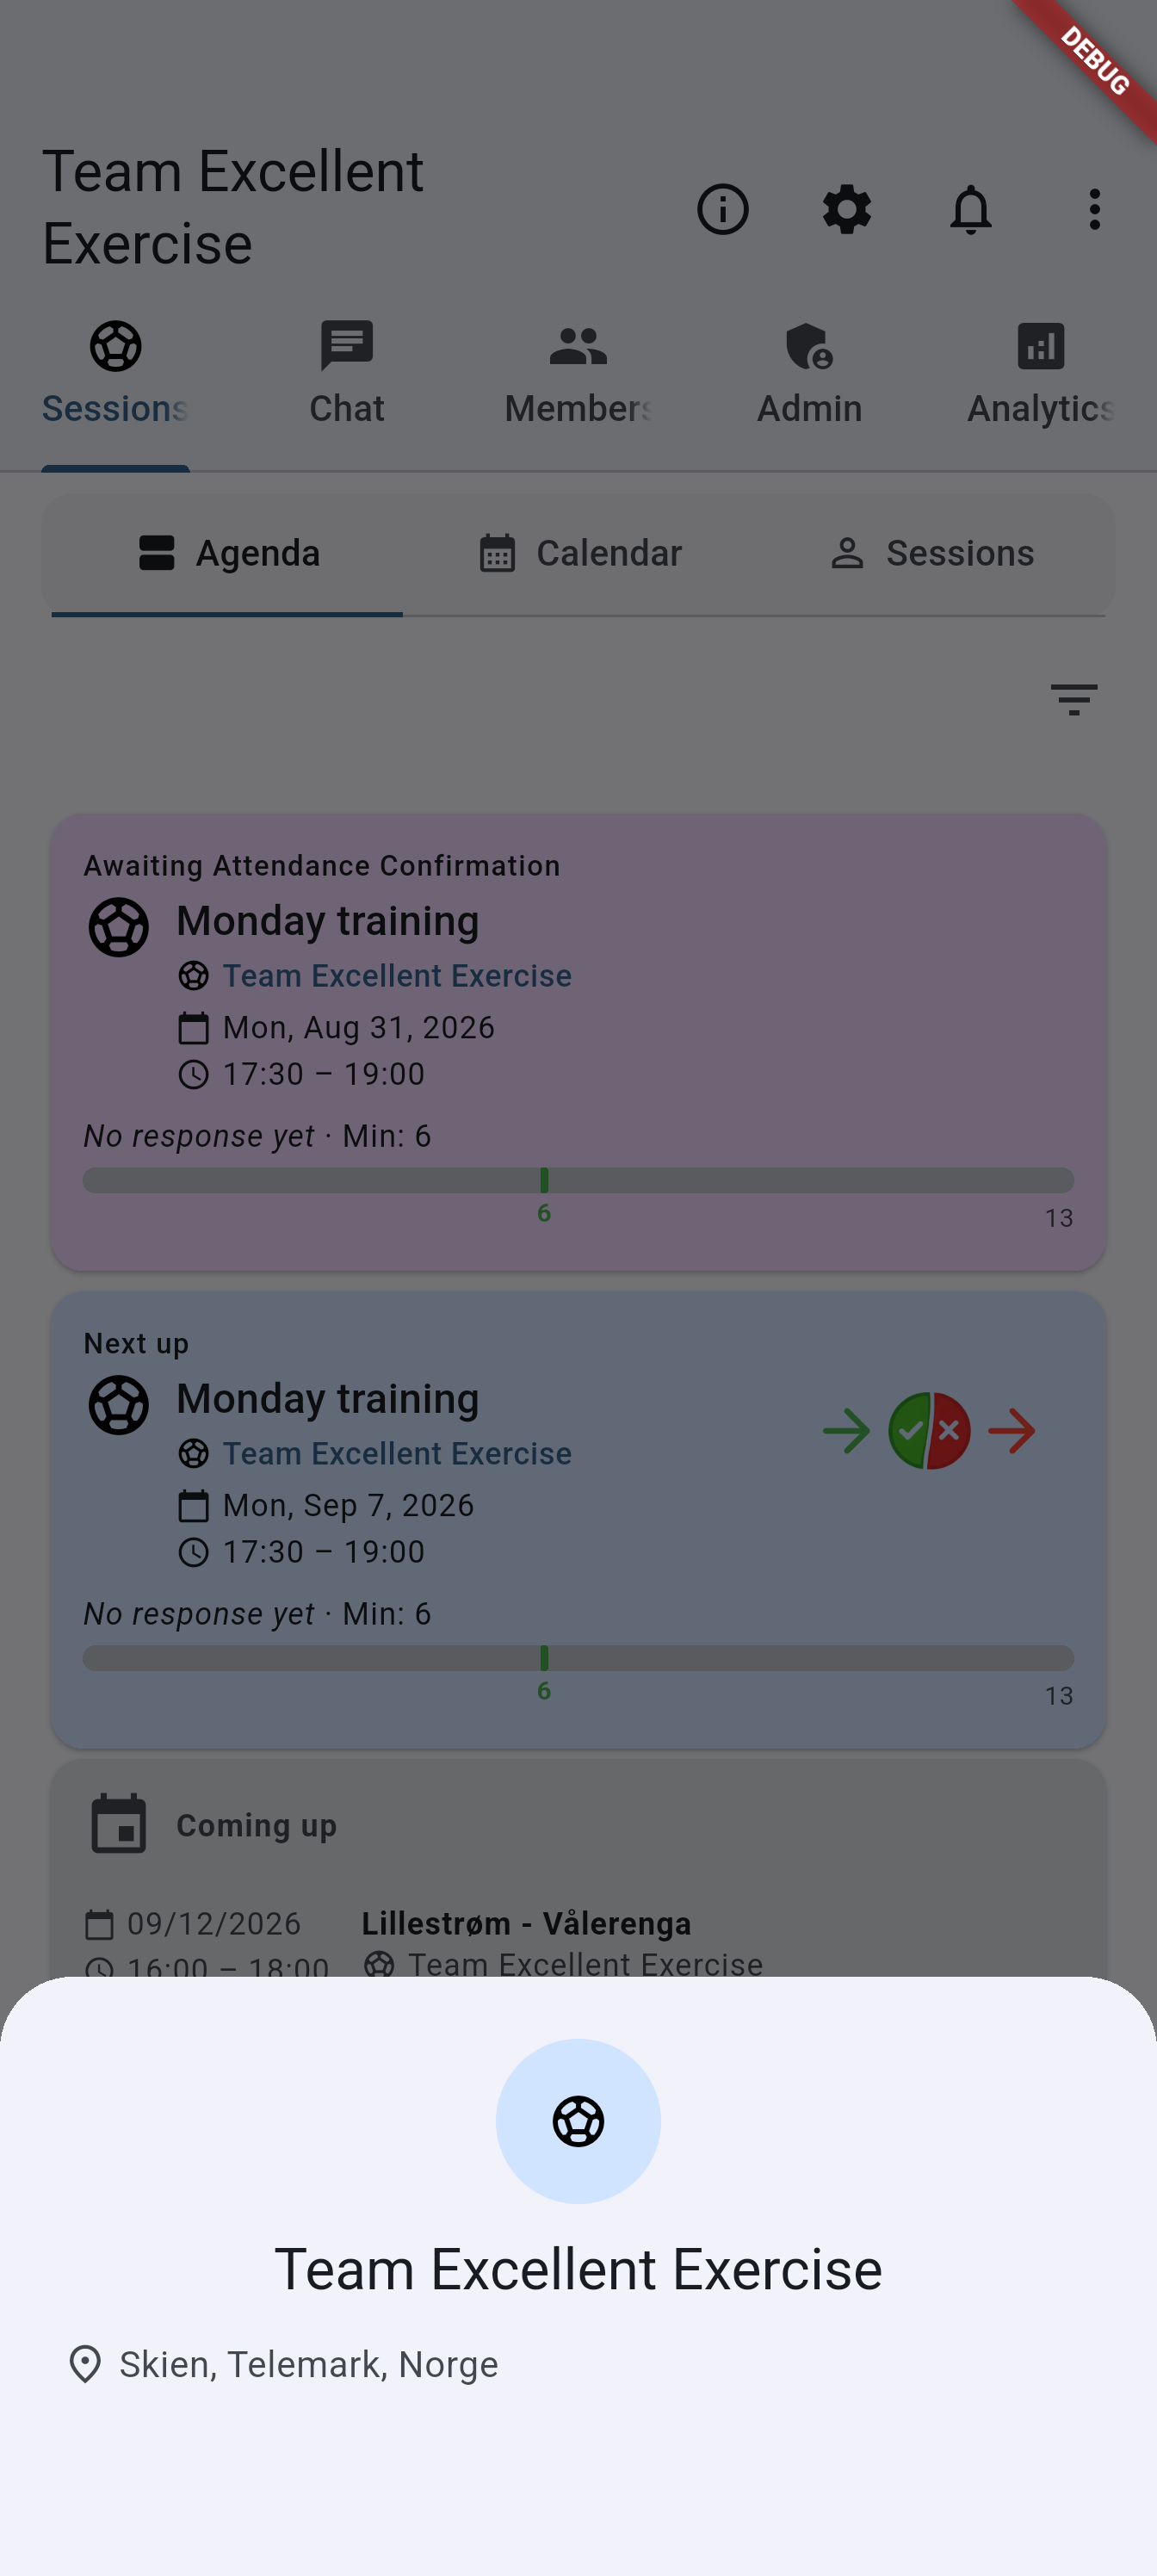

Recommended capture: the team info sheet with banner, profile image, description, contact rows, the expanded location map, and tappable links.
Switching a feature off never erases the setting underneath. If a subscription lapses and later returns, the team’s switches are exactly as they were left.
The top of the settings screen also shows the icon picker, name, description, and location fields, which are always editable. The Discover status under the location field updates as you change the location or flip the Public team/group toggle, before you save.
Turning the team private also turns Auto-accept join requests off in the same step, because a private team receives no join requests to accept.
Most of these settings are plan-sensitive: a switch can only ever disable something the plan already allows, never enable something it does not.
- Requires Pro or higher: private groups, auto-accept join requests, announcements, decision deadlines, activity planning, polls, guests.
- Requires Business: waiting list (and its offer window), attendance confirmation, check-in, prize draws, analytics, the forum, recurring activity planning, and hiding the member or participant lists.
- Keeps working after a lapse: a hidden member or participant list stays hidden whatever the plan becomes; you can always show it again.
- No plan requirement: chat, and the four member permissions — allow member invites, member-created events, advanced options, and member Quick Quizzes (a Quick Quiz still needs polls on the plan).
When the current plan does not cover a feature, its switch is locked and reads as off. The stored value is left untouched, so restoring the subscription brings the team’s own choices back rather than resetting them.
Member management
Admins can:
- invite users by email,
- add, merge, and promote managed members,
- edit ordinary members’ names and phone numbers — the change shows in every team and group the member belongs to, and the member gets a notification and a notice on their home screen saying which team made it,
- manage time off for members, in this team only,
- remove and block members from the current group,
- and remove members when needed.
Managed members are a paid feature and are subject to tier-specific limits.
The Members tab has a search field at the top that narrows the roster, the join requests and the pending invites by name or email. Under it sits a filter that shows one section at a time — All, Admins, Members, Requests or Invited — where the last two are offered only to admins and to members who can invite.
Add a managed member manually
Group adminsUse this when someone belongs in the roster before they have their own login.
- Open Members and choose Add Manually.
- Enter first name, surname, and an optional phone number.
- Save the managed profile.
The person appears immediately in the current group as a managed member. Managed members count toward both the total member limit and the managed-member limit, and newly added managed members can also be added to active activity plannings as optional participants.
A managed member belongs to this team or group only. Nobody can find it in member search, invite it anywhere else or add it to another team, and it never signs in.
If the current group plan does not allow managed members, the add dialog shows upgrade guidance instead of the form.
Edit, promote, or remove a managed member
Group admins- Use Edit to correct the managed member’s name or phone number, or to note a Contact email — where you reach the person, or whoever looks after them. It is optional and never used for signing in, so two managed members can share one address, and clearing the field removes it. Only the admins of the team or group see it. Nobody can find a managed member in member search, so there is no public profile setting to choose.
- Use Promote when the person is ready for a real account. The contact email is suggested, and you can enter another address. The managed profile becomes a normal email account, and the person receives instructions to use Forgot password to set their first password.
- Use Remove when the placeholder profile is no longer needed. The managed account is deleted with it, because it belongs to this team or group only. Deleting the team or group deletes its managed members too.
Managed members can be promoted into ordinary accounts, but they do not become group admins directly while they are still managed profiles.
Invite members
Group admins Members (when Allow member invites is on)The + button in the Members tab opens a menu with the following actions (shown depending on your role and group settings):
- Invite Existing User (admins only) — search for a registered user by name, or by their full email address, and send them an invitation. Nobody joins a team or group without accepting: they become a member only when they accept it, from their Home screen or the invitation email. You never see their email address — the invitation shows their name if their profile is public, and Invited member otherwise.
- Invite by email — send an email invitation.
- Add from Contacts — opens your phone’s own contact picker. You pick one contact per tap, and can go back for another; the app asks for no contacts permission on either Android or iOS. The app never reads or stores your address book — only the contact you hand it. Only a contact with an email address can be invited: on Android the picker lists email addresses, so a contact without one is not shown, and on iOS one without is skipped.
- Share Invite Link — share the invite message through other apps.
- Add Manually (admins only) — add a managed member placeholder. See the section above.
- Get Join Instructions — opens a dialog with step-by-step download and setup instructions for Android and iOS, including a tappable invite code chip the user can copy or share.
The menu items that require canInvite access (Invite by email, Add from Contacts, Share Invite Link, Get Join Instructions) are visible to group admins at all times and to regular members only when Allow member invites is enabled in group settings.
Pending invites
Pending invitations are listed in the Members tab under an Invited heading. An invited person is not a member yet, so tapping the row opens nothing and their profile cannot be changed. Each pending invite has a menu with two actions:
- Resend Invite — sends the invitation again.
- Remove Invite — cancels the invitation.
Admins see both on every invitation. A member who sent an invitation by email sees them on their own invitations only.
User reports
Group adminsWhen a member reports something (Chat and announcements), it lands in the User reports entry on the Admin tab. The entry carries a badge with the number of reports still waiting, and it is there on every plan.
Five kinds of thing can be reported: a chat message, a member’s name, a member’s profile picture, a public team’s profile — its name or description — and a Forum post. Each reported thing is one card, however many people reported it. A card shows:
- what was reported, as it was at the time — the message and when it was sent, the name, the picture (tap to show it), the team’s name and description, or the post — with a note when it has changed since,
- who it belongs to,
- how many times they have been reported here before,
- and everyone who reported it, with their reason and any note they added.
Tap Reported by … to expand that list.
The list opens on the reports still waiting. The filter icon in the top-right corner switches it to Declined, Member blocked, Action taken or All, so you can look back at what the team has already answered, and the icon stays highlighted while the list is narrowed. The search field above the list narrows it to one member’s name or the words that were reported.
You have two answers:
- Decline — nothing changes, and the report is closed. The people who reported it are not told.
- Remove and block — offered when the report is about a member or something they wrote. The member is removed from the team and cannot rejoin, exactly as if you had blocked them from the Members tab. Every other open report against them here is closed at the same time.
Both stay inside the team. The remedies that reach further — resetting a member’s name, clearing their picture, clearing a team’s profile and taking it off Discover, or removing a Forum post for everyone — are taken by InOrOut’s moderators, not by the team, and a team cannot undo them. A card dealt with that way is marked Action taken.
A few things worth knowing:
- If a message is older than the team’s chat-history window it may already have been deleted from the conversation. The card still shows what was written, with a note that the original is gone. A Forum post its author has deleted keeps its card the same way.
- If a report you declined is reported again by somebody else, the card comes back marked Reported again after being declined.
- If the member has already been blocked or has left, the block button is replaced accordingly and only Decline remains.
Blocked members and re-invites
Group adminsFrom a member’s info sheet in the Members tab, open the actions menu and use Remove and Block from Group when you want to remove someone and prevent them from rejoining right away.
The same sheet also carries Report this member, the way to report a member’s name or profile picture — it asks which of the two you mean, and the report lands in the queue above.
When a user is blocked in a group:
- they are removed from that group’s roster,
- the group is hidden from that user’s public search results,
- and they cannot rejoin until an admin removes the block.
Manage blocked users from the Admin tab
The Admin tab shows a Blocked Members entry on every plan, Free included.
Open it to see everyone currently blocked in that group; the search field above the list finds one by name or email. Each blocked user has a three-dot menu with these actions:
- Remove — removes the block only.
- Remove and Re-invite — removes the block and immediately sends a new invite email so the user can join again.
invite-from-contacts-android.pnginvite-from-contacts-ios.png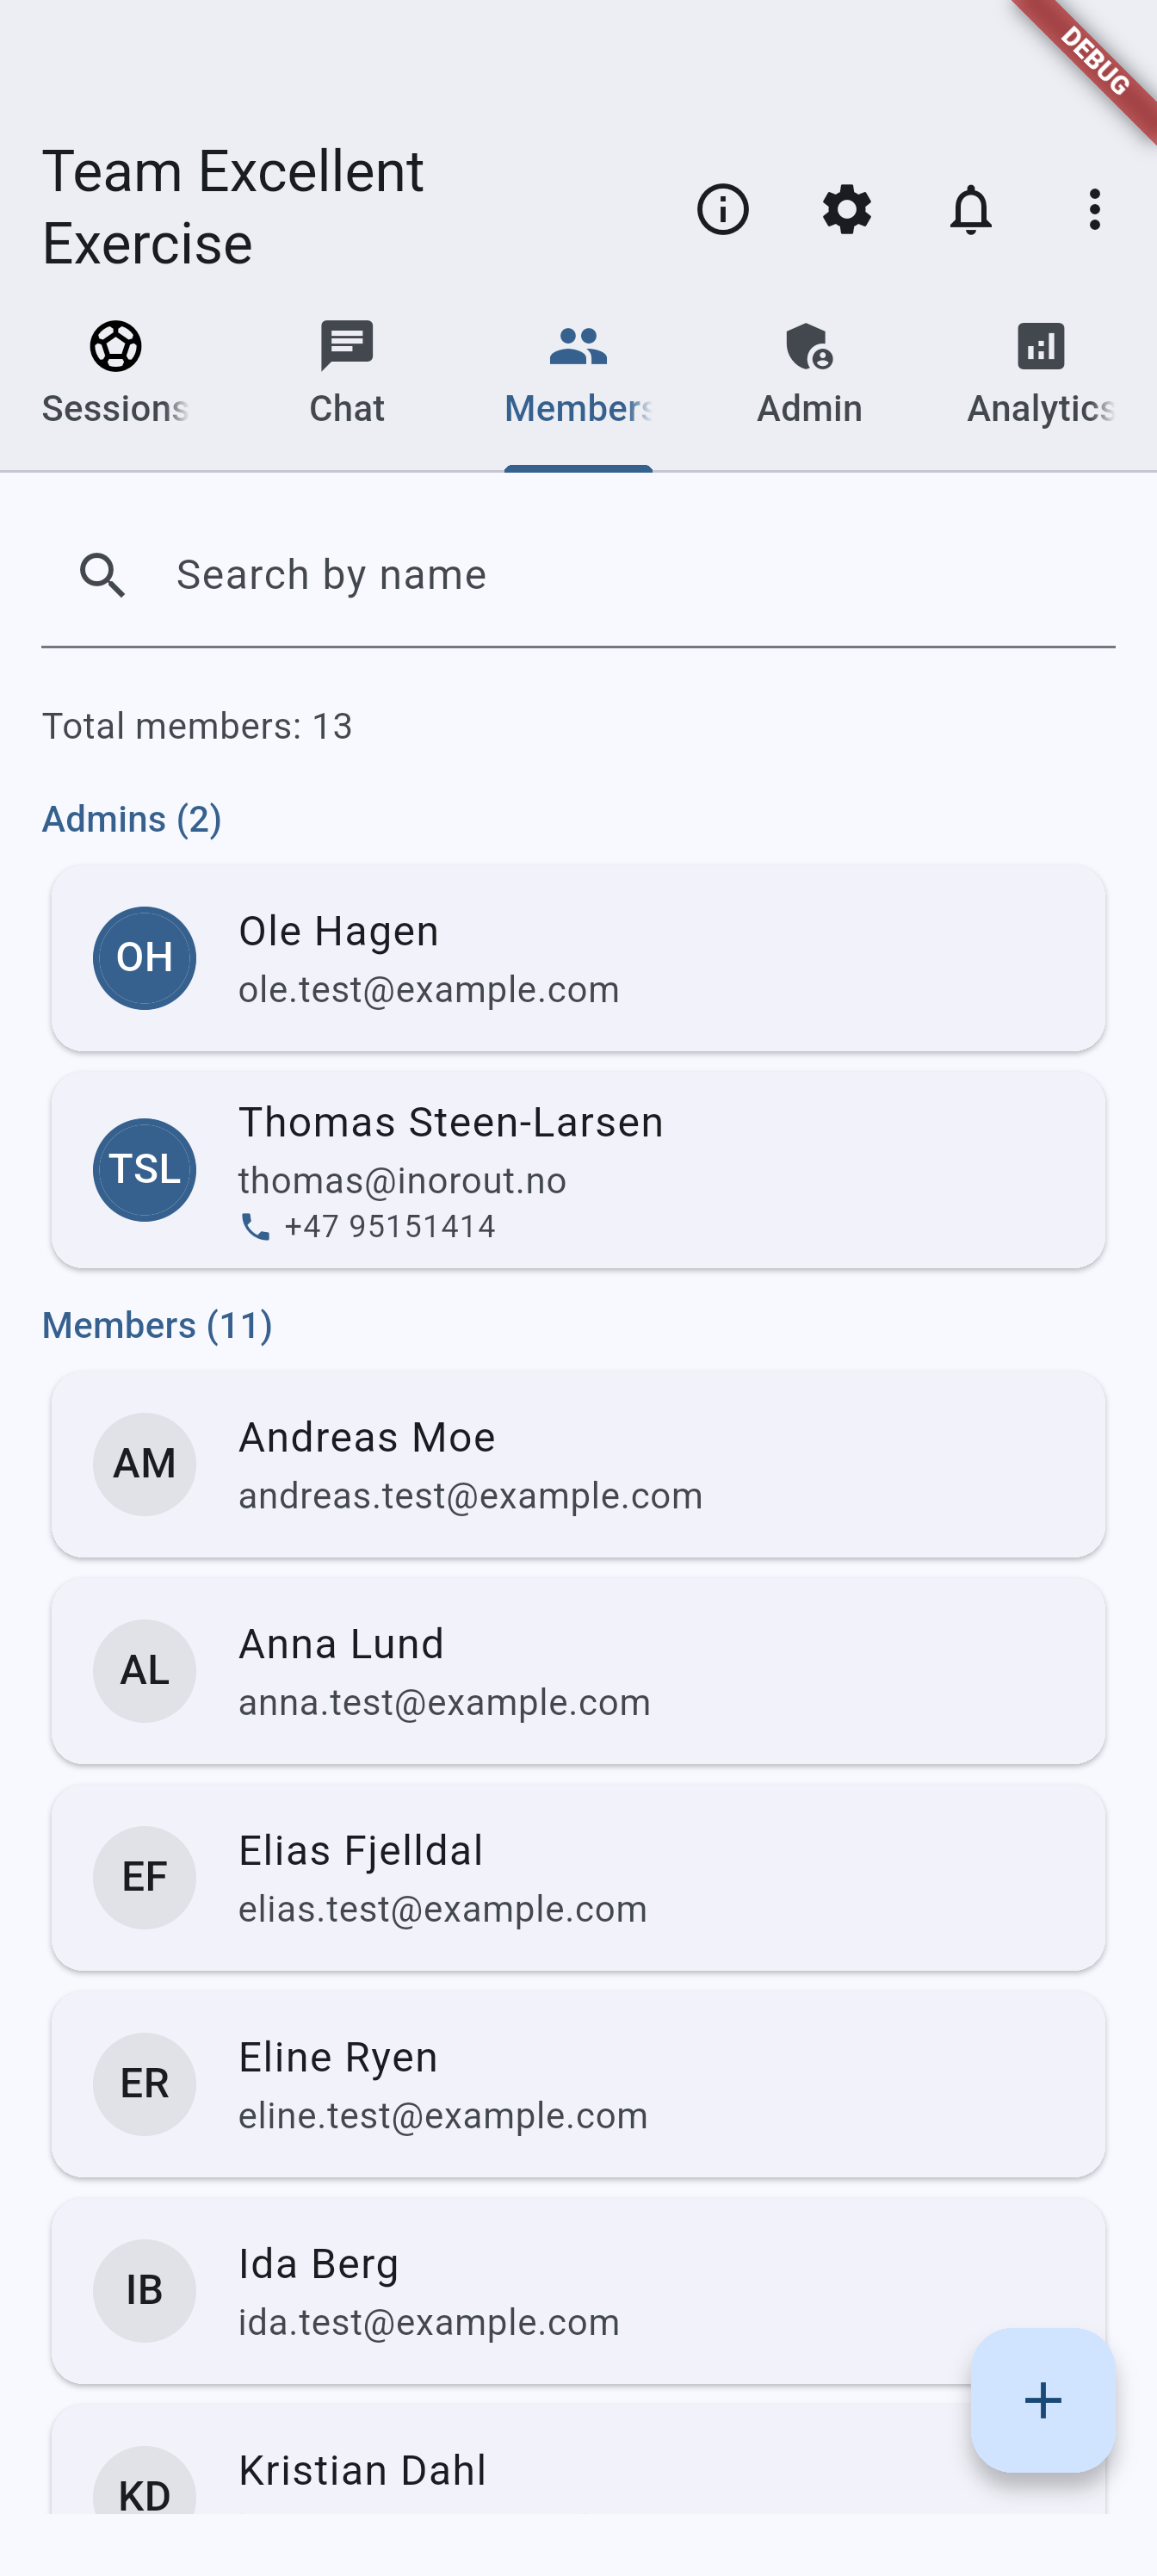
Recommended capture: the Members tab add-actions menu with Add from Contacts visible, or the phone's own contact picker it opens.
Merge a managed member into an existing member
Group adminsUse this when someone was added manually first and later joins the same team or group with their own account.
- Open the team or group and go to Members.
- Open the managed member’s info sheet.
- Select Merge Into Another User.
- Search for and select the ordinary member account you want to keep.
- Confirm the merge.
The ordinary member account stays in the roster. The managed profile is removed after the merge completes. Same-group attendance history, activity-planning invitations, voting history, and related member history are preserved on the kept account where possible.
The merge action only appears when there is at least one eligible non-managed member in the current team or group.
team-search-android.pngteam-search-ios.pngRecommended capture: the full-screen team search with a typed query, results showing icon and member count, and one row marked pending approval.
group-detail-tabs-android.pnggroup-detail-tabs-ios.png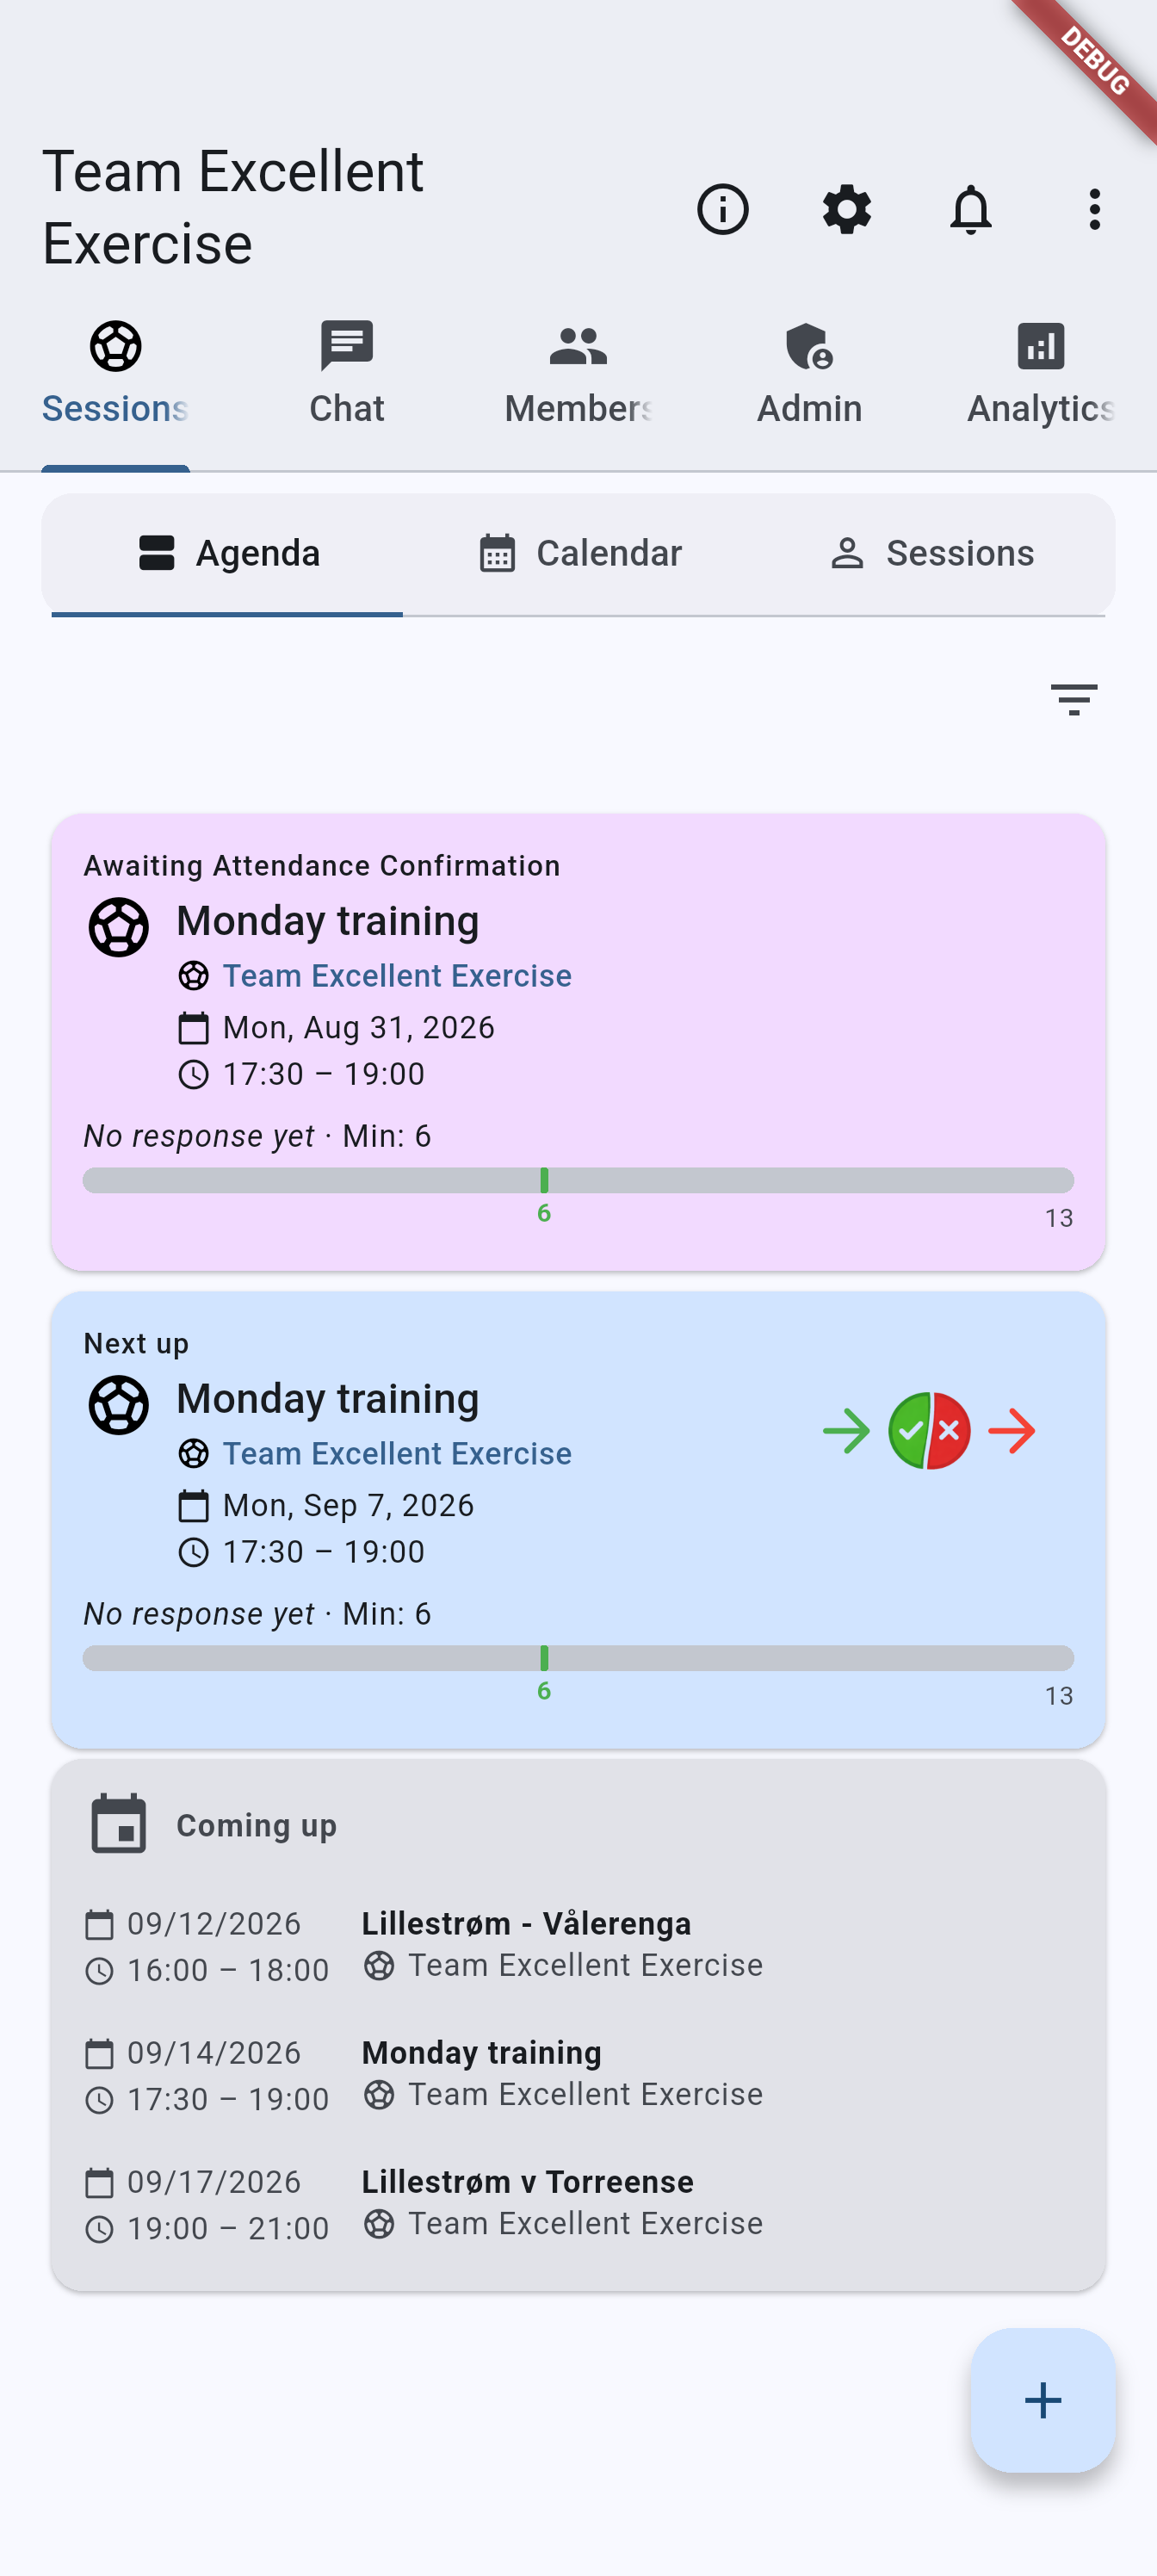
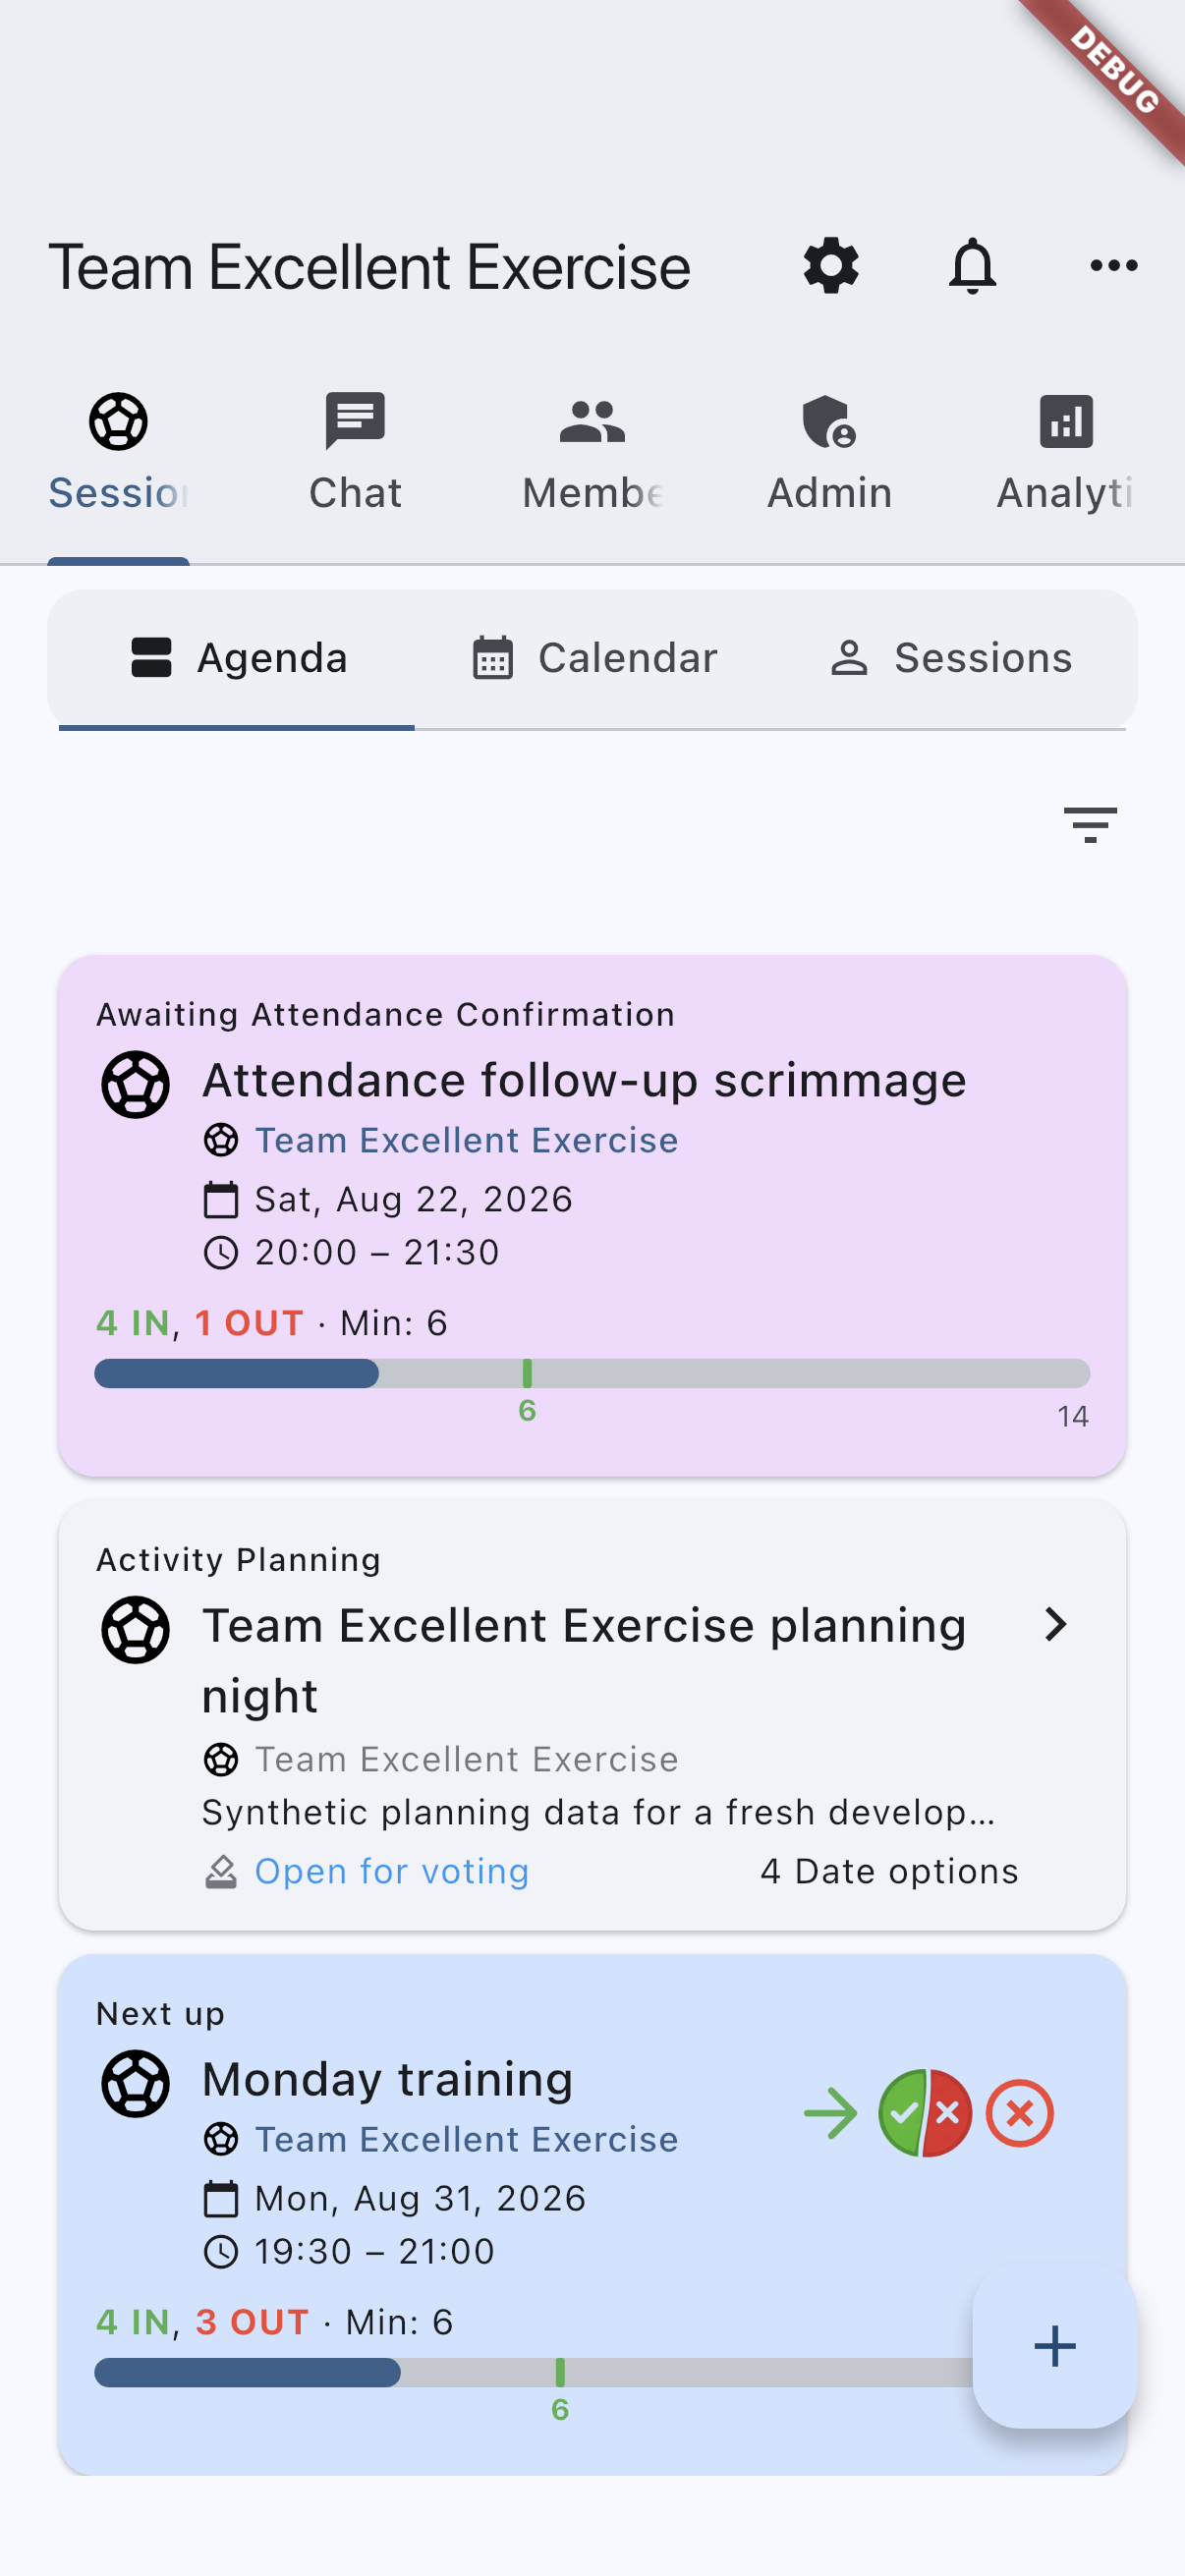
Group detail screen with the primary tabs visible so the navigation model is easy to understand at a glance.
group-settings-android.pnggroup-settings-ios.png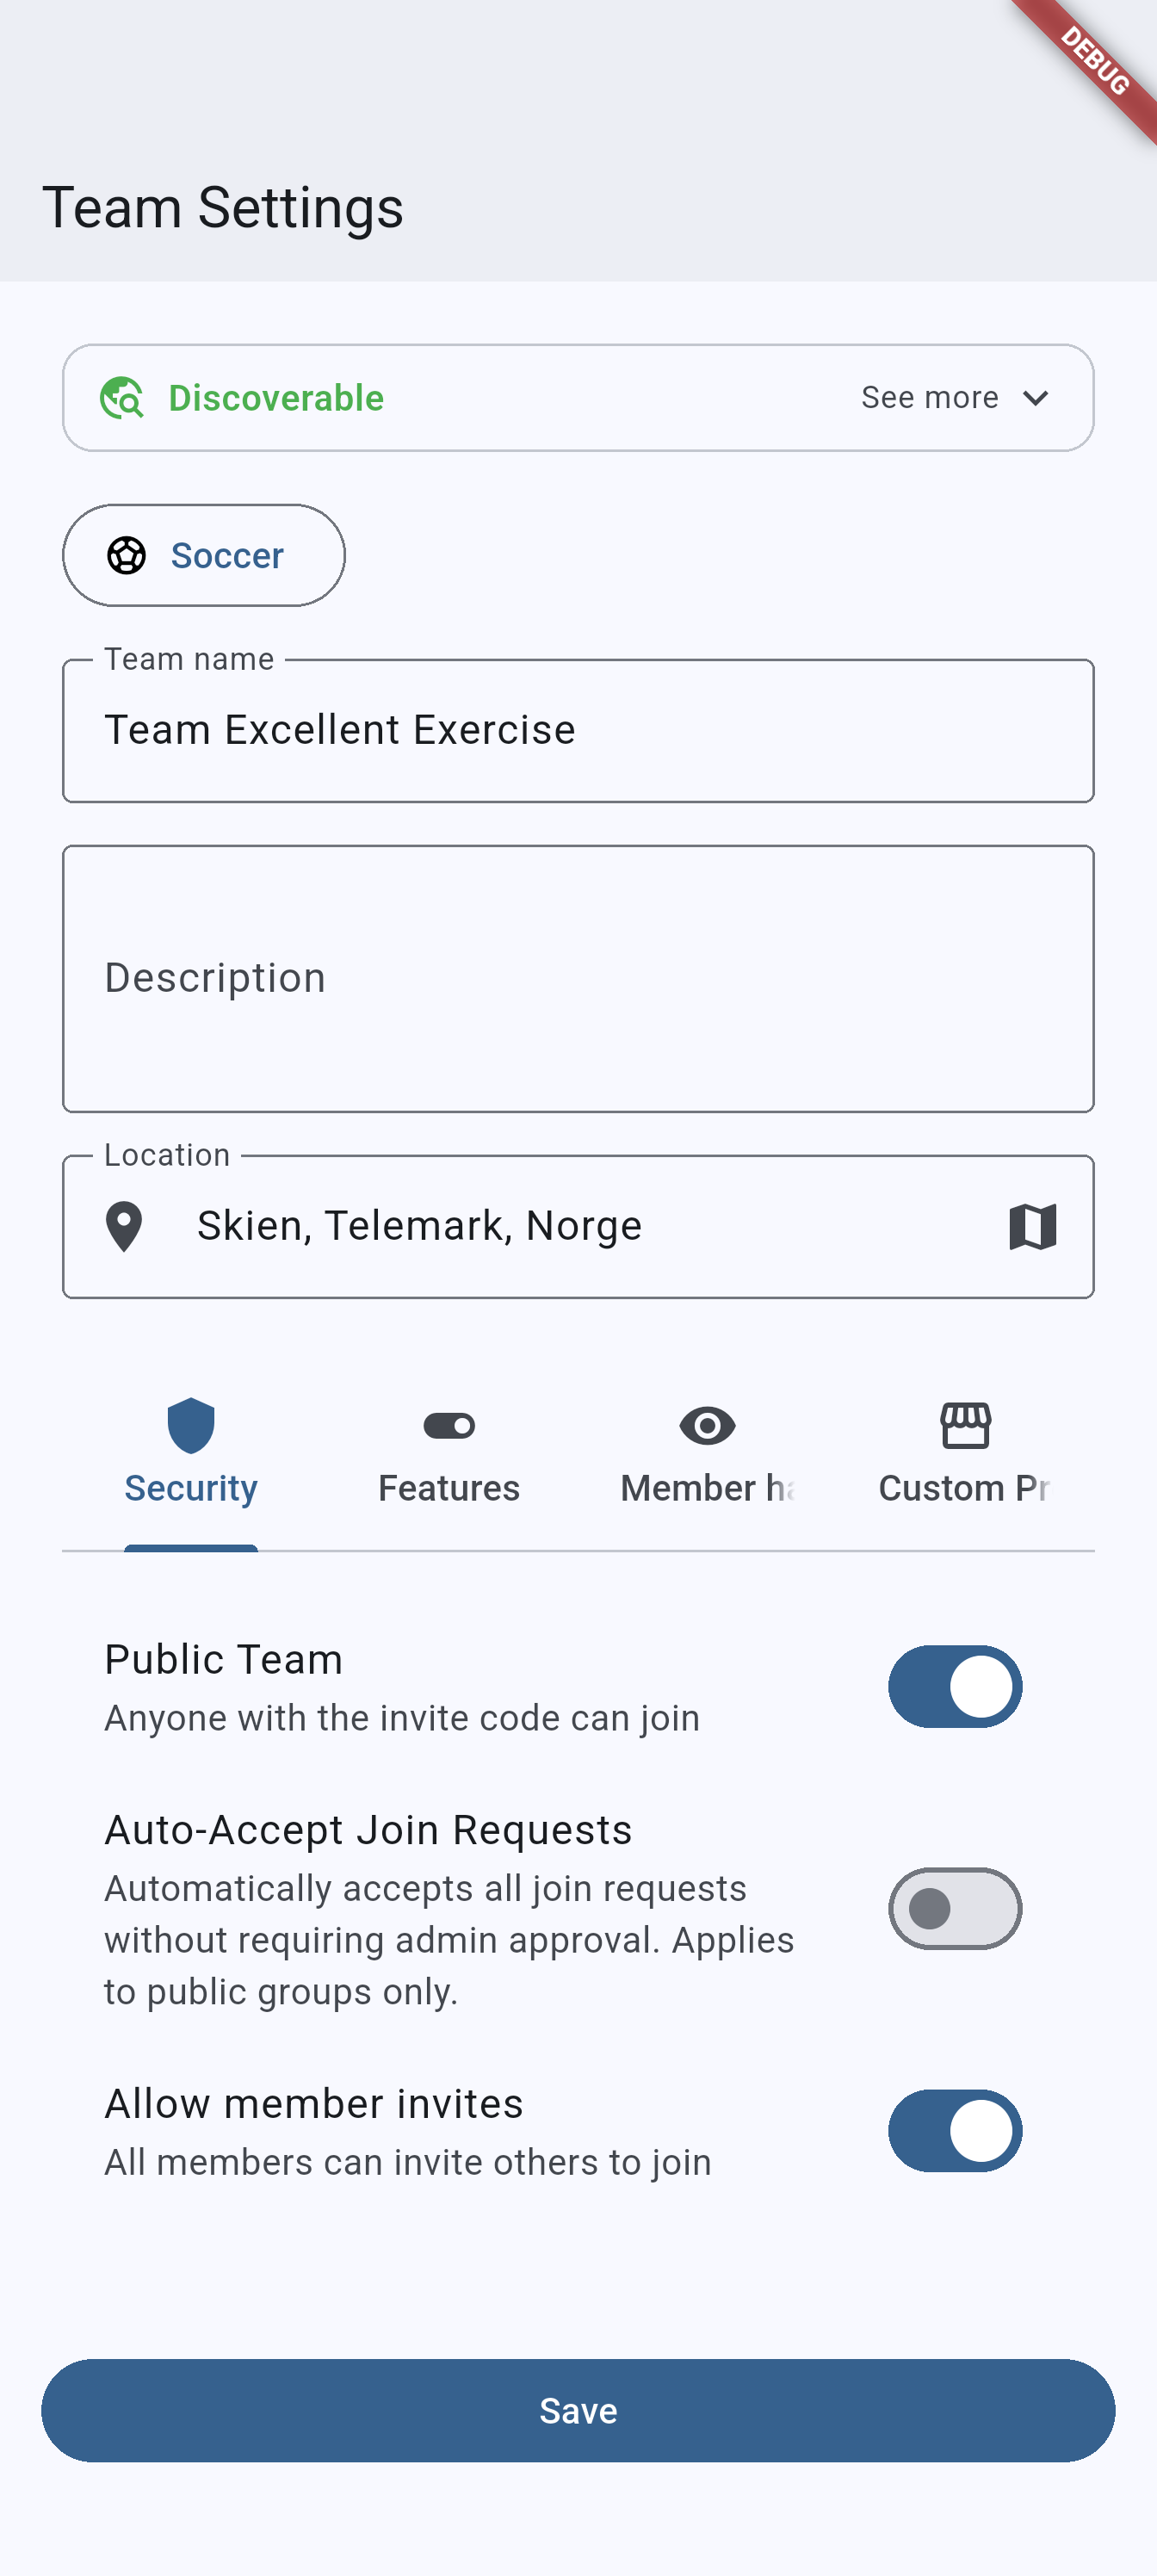
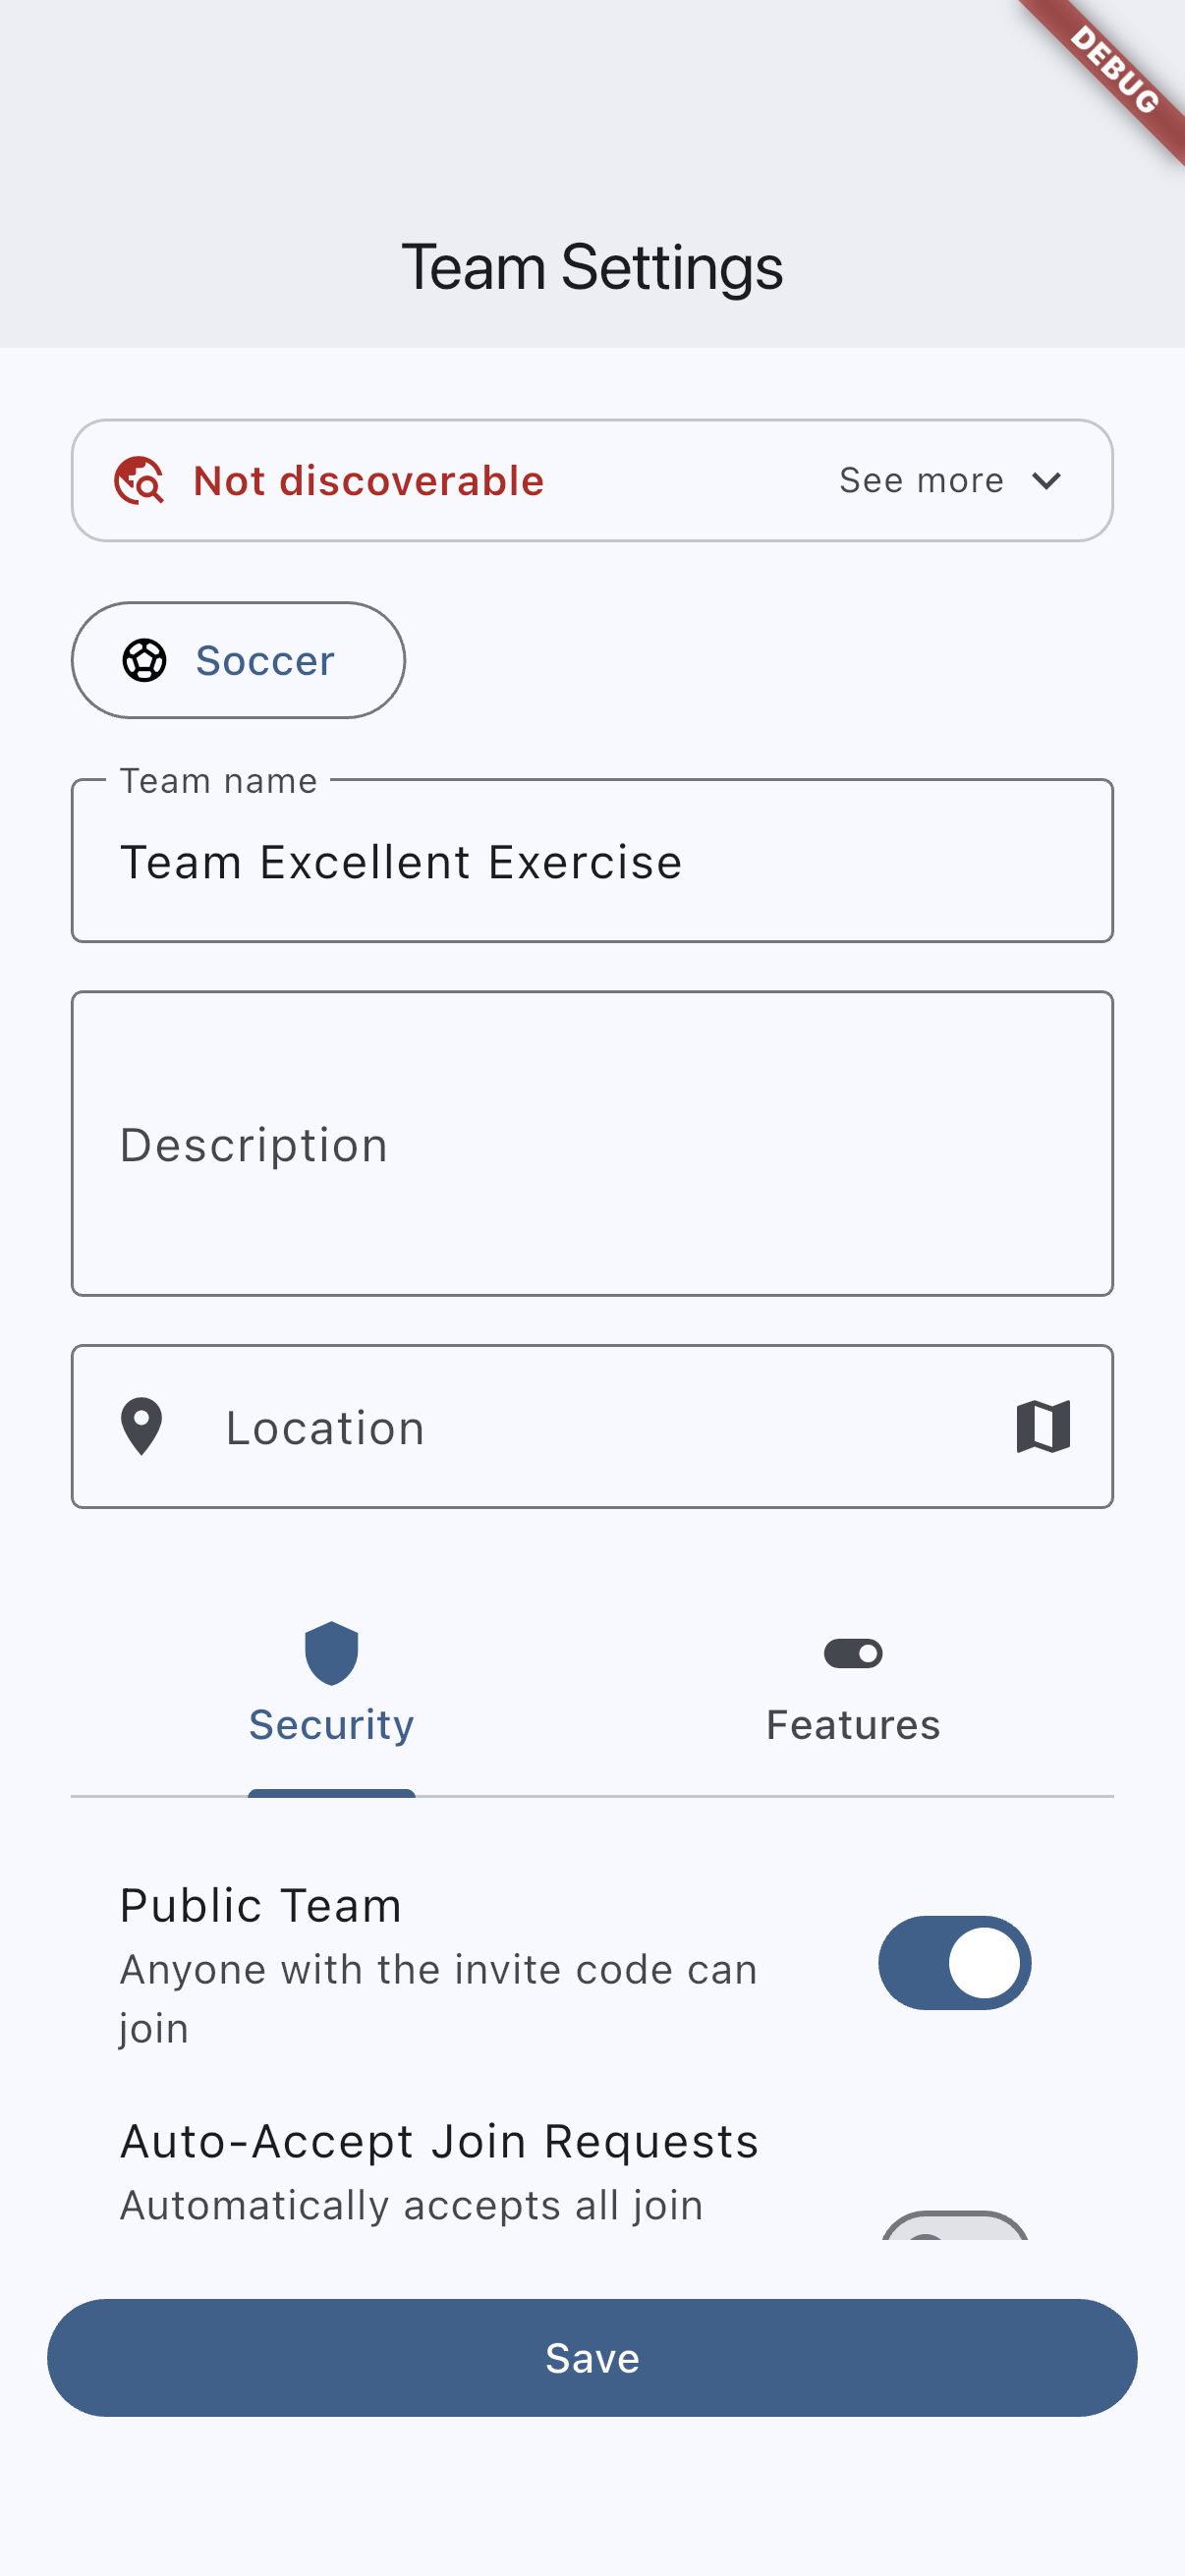
Recommended capture: the group settings screen with icon picker, name and description fields, privacy toggle, and feature toggles.
System admin access requests
Group adminsSystem administrators may occasionally need to review a group’s data. When they do, they must request access first and group admins must approve it. This is a consent-based flow.
The Admin tab in every group has a System Admins — Pending requests card at the top. A numbered badge appears on the shield icon when there are pending requests. Group cards on the home screen also show this badge.
When you open the card, each pending request shows the requester’s name, email, and an optional message explaining why they need access.
- Approve — pick how long the access should last: 1 hour, 1 day, or 7 days.
- Decline — enter an optional reason.
Access expires automatically after the chosen duration. This feature is available to all group admins regardless of plan tier.
Leave or delete a team
The overflow menu on a team’s own page holds the actions that end your relationship with it, alongside Manage plan (admins only), Restore dismissed items — which brings back both the group announcements and the polls you have dismissed — and, for members who are not admins, Report this team, for a name or description that should not have been written.
Leave team removes you from the roster and sends you back to the home screen. What it asks first depends on who else is left:
- You are the last non-managed member. Leaving is refused — a Cannot leave dialog explains that you must delete the team instead, because managed members have no login and would be left with nobody to run the team.
- You are the only admin, and other members remain. Before you can go, the team needs a new admin. If there is exactly one candidate, the app names them — “[Name] will be promoted to admin” — and asks you to confirm. If there are several, you pick one from a New admin dropdown.
- Anyone else. A plain confirmation, and you are out.
Delete team is admin-only and permanent. It runs in two steps:
- The first dialog lists what goes with the team — the number of members and the number of sessions or activities — and holds the delete button disabled until you type the confirmation word into the field below the summary.
- A final dialog names the team once more and asks you to confirm with Delete permanently.
Every other member is notified that the team was deleted.
The team, its memberships, its sessions and activities, and its chat history all go together. There is no restore, so if you only want out yourself, use Leave team instead.
Related pages
- Events and attendance for event creation, RSVP flows, and attendance confirmation inside a group.
- Activity planning for date voting when the schedule is not fixed yet.
- Calendar subscriptions for importing an external schedule into a group.
- Chat and announcements for how a member files a report in the first place.
- Plans and billing for understanding which admin features are tier-gated.